
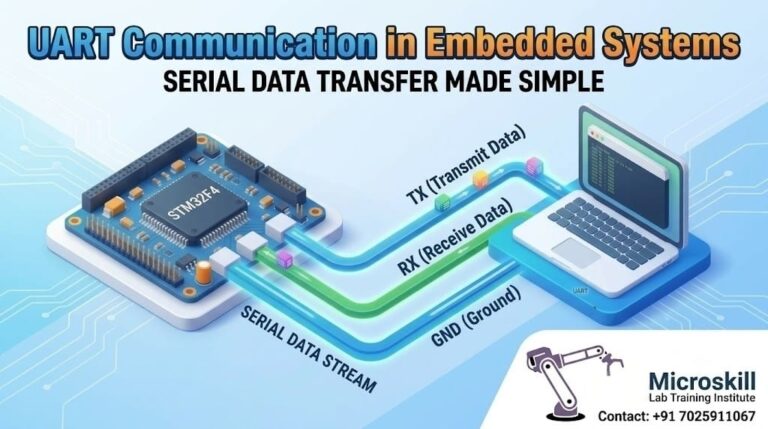
UART communication is a serial communication protocol that lets two devices exchange data over just two wires, one to transmit and one to receive. For embedded developers in Bangalore and across India, UART is usually the first protocol you master, because it powers sensor debugging, GPS modules, and Bluetooth links. It underpins how a microcontroller talks to the outside world without any shared clock line. This guide explains how UART works, how to program it, and where it fits alongside SPI and I2C in real embedded systems. Whether you build IoT devices or ARM-based products, a solid grasp of UART is foundational to a strong embedded engineering career.
⚡ Key Takeaways
- You will understand how UART transmits data asynchronously using start bits, data bits, and stop bits over two wires.
- You will learn to configure baud rate, parity, and framing so two devices communicate reliably without a shared clock.
- You will see how UART compares with SPI and I2C, and when each protocol is the right choice.
- You will gain practical UART programming skills that transfer directly to Arduino, ARM, and IoT platforms.
- You will discover embedded career paths in Bangalore where serial communication expertise is in real demand.
What Is UART Communication?
UART stands for Universal Asynchronous Receiver Transmitter, a hardware block that converts parallel data inside a microcontroller into a serial stream for transmission. Because it is asynchronous, the two devices share no clock line and instead agree on a common speed called the baud rate. Each device must be configured identically, or the received bytes arrive as garbage. This blend of simplicity and reliability is why UART remains a staple across embedded systems, from student projects to industrial controllers deployed across Karnataka. The name itself signals its flexibility, since a single peripheral can adapt to many devices simply by changing its configuration. That adaptability is what keeps UART relevant even as newer high-speed interfaces emerge.
Who Should Learn UART
Every embedded developer benefits from mastering UART early, because it appears in almost every real project. Firmware engineers use it daily to print debug logs, flash bootloaders, and read sensor data during development. In our experience training freshers from ECE and EEE backgrounds across South India, UART is the concept that finally makes serial communication click. Our trainers introduce it as the gateway skill before students advance to SPI, I2C, and network protocols in our Embedded Systems Pro Programme.
The Two-Wire Foundation
At its core, UART needs only two signal lines plus a common ground reference. The transmit pin of one device connects to the receive pin of the other, and the receive pin connects back to the transmit pin. This crossover wiring is the single most common beginner mistake we correct in our Bangalore labs. Once the wiring is right, the protocol handles framing automatically, which is why it feels far more approachable than clocked alternatives. A shared ground is easy to overlook yet absolutely essential, because without it the two devices have no common voltage reference. We stress this point early so learners avoid hours of confusing debugging later.
How UART Works: Frames, Bits, and Timing
A UART frame is a small packet that wraps your data byte with control bits, so the receiver knows exactly where a transmission begins and ends. The line sits idle high until the transmitter pulls it low for one bit period, signalling the start of a frame. The receiver then samples the incoming bits at intervals set by the agreed baud rate. This self-timed structure is precisely what allows communication without a dedicated clock wire between the two devices. The receiver typically oversamples each bit several times to lock onto the centre of the signal accurately. This oversampling is how UART tolerates the small clock differences that always exist between real hardware.
Start Bits, Data Bits, and Stop Bits
Every UART frame follows a predictable order that both devices must respect exactly. Understanding this order is essential before you write a single line of UART programming code. Our curriculum drills this framing with logic-analyser captures, so learners see the real waveform rather than only theory.
- Start bit: one low bit that wakes the receiver and begins the sampling process.
- Data bits: typically five to nine bits carrying the payload, sent least significant bit first.
- Parity bit: an optional error-check bit set for even or odd parity.
- Stop bits: one or two high bits that clearly mark the end of the frame.
Baud Rate and Why It Must Match
Baud rate is the signalling speed of the link, and common values include 9600, 115200, and higher. Both devices must use the same baud rate, parity setting, and stop-bit count, or the data corrupts silently. A small amount of clock drift is tolerable, but a mismatch of even one setting breaks communication entirely. We teach students to calculate baud-rate error margins, so their designs stay reliable across temperature swings and supply variation.
UART vs SPI vs I2C: Choosing the Right Protocol
Embedded developers rarely rely on a single protocol, so knowing when to pick UART over SPI or I2C genuinely matters. UART excels at simple point-to-point links and debug consoles, SPI suits high-speed peripherals, and I2C connects many low-speed sensors on one shared bus. Each communication protocol trades off speed, wiring, and complexity in a different way. Choosing well is a practical skill our trainers emphasise through real design decisions in the lab. Rather than teaching protocols in isolation, we present a project brief and let learners justify their protocol choice. This mirrors how firmware teams at Bangalore product companies actually make architecture decisions every day.
A Practical Comparison
The table below summarises the trade-offs we walk through with every batch of learners. It helps students match a protocol to a project instead of memorising isolated specifications. This decision-making mindset sits at the heart of our Electronics Fundamentals course.
Table: UART vs SPI vs I2C at a Glance
| Feature | UART | SPI | I2C |
|---|---|---|---|
| Wires needed | 2 | 4+ | 2 |
| Clock line | No (asynchronous) | Yes | Yes |
| Typical speed | Up to ~1 Mbps | Tens of Mbps | Up to 3.4 Mbps |
| Devices per bus | 2 (point-to-point) | Many (via chip select) | Many (via address) |
| Best use | Debug, GPS, modules | Displays, flash memory | Sensor networks |
When UART Is the Right Choice
UART is ideal when you need a straightforward, reliable link between just two devices. Debug output, GPS receivers, GSM modems, and many wireless modules default to UART for exactly this reason. When a design grows to several peripherals, our trainers guide learners toward SPI or I2C instead. This judgement, knowing the natural boundaries of each protocol, is what separates a hobbyist from a job-ready engineer.
UART Programming: From Registers to Working Code
Writing UART code means configuring the peripheral registers for baud rate, frame format, and interrupt behaviour before you send or receive any bytes. On Arduino the Serial library hides much of this complexity, while on ARM microcontrollers you often configure registers directly. Both approaches teach valuable lessons about how embedded programming maps onto real hardware. Our project-based teaching ensures learners move between these abstraction levels with genuine confidence.
Getting Started on Arduino
Arduino is where most of our students send their very first UART message, using the familiar Serial.begin and Serial.println functions. This friendly starting point removes register-level intimidation while still teaching baud rate and framing concepts. Learners then build sensor-logging projects that stream live data to a PC terminal. Those foundations are covered thoroughly in our Arduino Programming course.
Moving to ARM and Bare-Metal UART
Once comfortable, learners progress to ARM Cortex-M microcontrollers, where they configure UART peripherals through registers and interrupts. This bare-metal work reveals exactly what the Arduino library abstracts away, deepening real embedded understanding. We pair it with logic-analyser debugging, so students diagnose framing and baud errors on their own. This depth prepares them well for professional firmware roles across Bangalore’s many product companies. Working close to the registers also builds intuition for interrupts, buffers, and DMA, which matter in performance-critical firmware. Employers across Electronic City and Whitefield consistently value engineers who understand what happens beneath the library layer.
Ready to master serial communication hands-on? Our trainers take you from your first UART “Hello World” to bare-metal ARM firmware through live projects and real lab hardware, not just slides. Join learners across South India building genuine embedded skills. Explore the Embedded Systems Pro Programme →
UART in IoT and Modern Embedded Products
UART remains everywhere in IoT despite the rise of wireless protocols, because so many modules speak it natively. ESP32 Wi-Fi modules, LoRa radios, and cellular modems commonly expose a UART interface for command and data exchange. This makes UART an essential bridge between microcontrollers and the connected world. Understanding it well is vital for anyone building modern IoT products in India’s fast-growing hardware sector. As India’s electronics manufacturing expands under national initiatives, demand for engineers who can bridge sensors and cloud is rising steadily. UART sits right at that bridge, connecting microcontrollers to the radios that carry data upward.
UART Behind Wireless Modules
Many popular IoT radios are controlled through simple text commands sent over UART, widely known as AT commands. A microcontroller sends these commands and reads back responses to manage connectivity and data flow. Our learners practise this directly with real ESP and GSM modules in our IoT Programme. Watching a device connect to the cloud over a plain UART link makes the abstract feel tangible.
Reliability in Real Deployments
In field deployments, UART links must survive electrical noise, long cable runs, and gradual timing drift. Engineers add parity checks, checksums, and sometimes RS-485 transceivers to extend both range and robustness. We teach these production concerns, so learners design for the real world rather than only the lab bench. This reliability mindset is highly valued by employers building industrial IoT systems across Karnataka.
Career Scope for UART and Embedded Skills in Bangalore
Bangalore is India’s embedded systems capital, home to product teams at Bosch, Wipro, and countless hardware startups in Electronic City and Whitefield. Firmware and embedded job listings consistently name serial communication among their core requirements. Mastering UART, SPI, and I2C signals to recruiters that you truly understand hardware-software interaction. This foundation opens doors across the region’s thriving electronics and product-engineering industry. Beyond the well-known names, hundreds of smaller product startups around Manyata Tech Park and Electronic City hire embedded talent every year. A candidate who can confidently discuss UART framing and error handling immediately stands apart in these interviews.
Salary Benchmarks and Roles
Embedded and firmware engineers in Bangalore command competitive salaries as demand steadily outpaces supply. Freshers with strong protocol knowledge and a real project portfolio stand out in a crowded hiring market. Typical roles include firmware engineer, embedded developer, IoT engineer, and hardware validation engineer.
- Embedded firmware fresher: approximately ₹3.5–6 LPA (indicative only, verify before relying on it).
- Mid-level embedded engineer: approximately ₹8–15 LPA (indicative only, verify before relying on it).
- Senior firmware or IoT lead: approximately ₹18–30 LPA (indicative only, verify before relying on it).
Building a Job-Ready Portfolio
Recruiters value demonstrable projects far more than certificates alone, especially in embedded roles. Our learners graduate with capstone projects that showcase UART, sensor integration, and cloud connectivity end to end. Trainers with years of hands-on industry firmware experience guide each project toward professional standards. To start building that portfolio, simply reach out through our enquiry page.
Frequently Asked Questions About UART Communication
Below we answer the questions embedded learners across Karnataka, Kerala, and Tamil Nadu ask us most often. These reflect the real doubts raised every week in our Bangalore classrooms. We keep the answers practical, so you can apply them immediately in your own projects.
Is UART the same as serial communication?
UART is a specific hardware implementation of asynchronous serial communication, so the terms overlap but are not identical. Serial communication is the broad idea of sending bits one after another, while UART is one popular way to achieve it. SPI and I2C are also serial protocols, yet they rely on a shared clock line. So all UART is serial, but not all serial communication is UART.
What baud rate should I use?
The right baud rate depends on device support, cable length, and the surrounding noise environment, with 9600 and 115200 being common defaults. Higher rates move data faster but tolerate less clock drift and demand shorter cables. Both connected devices must always use the identical rate. We teach students to test incrementally and confirm with a logic analyser before committing to a final rate.
Can UART connect more than two devices?
Standard UART is point-to-point, designed for exactly two devices forming one transmitter and receiver pair. For multi-device links you would instead use I2C, SPI with chip selects, or an RS-485 multidrop bus layered over UART framing. Each of these options suits different project requirements and scales differently. Our curriculum covers these choices, so learners confidently select the right topology for every design.