
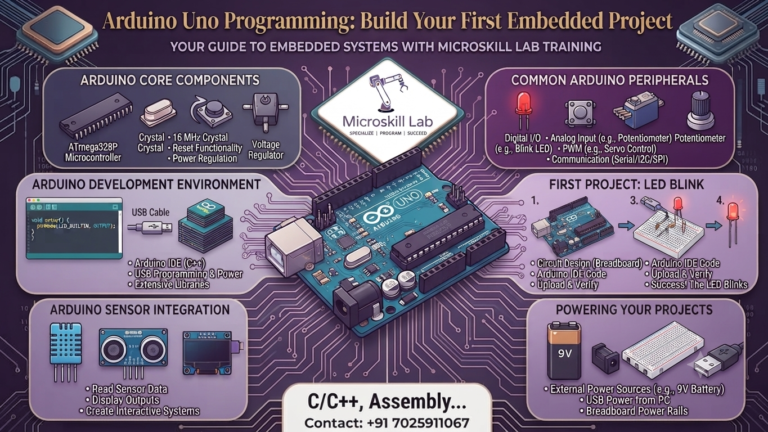
Arduino Uno programming is the fastest way for a beginner in Bangalore to write real embedded code. You connect a board over USB, open the Arduino IDE, write a short sketch, and watch an LED blink on physical hardware. That single loop teaches you GPIO control, timing, and the setup-and-loop model used across the embedded industry. We teach this exact path at Microskill Lab Training Institute to ECE, EEE, and CSE students across Karnataka, Kerala, Tamil Nadu, Telangana, Andhra Pradesh, and Puducherry. No prior electronics degree is needed. By the end of this tutorial, you will have written, compiled, and uploaded your first working project.
⚡ Key Takeaways
- Understand what the Arduino Uno board is and why beginners start with it.
- Install the Arduino IDE and upload your first sketch in under 30 minutes.
- Learn the Arduino programming language essentials including
setup(),loop(), variables, and functions. - Control LEDs through GPIO pins and read live sensor data.
- See how Arduino skills map to embedded engineering careers in Bangalore.
- Discover the next step toward professional microcontroller, RTOS, and Embedded Linux development.
What Is the Arduino Uno and Why Beginners Start Here?
The Arduino Uno is an open-source microcontroller board built around the ATmega328P microcontroller. It provides 14 digital input/output pins, 6 analogue input pins, USB programming support, and a simple hardware layout that makes learning embedded programming approachable.
Unlike many development boards, the Arduino Uno is extremely forgiving. Minor wiring mistakes rarely damage the hardware, while its enormous community means almost every beginner problem has already been solved somewhere online.
The Board at a Glance
The Arduino Uno operates at 16 MHz and includes:
- 32 KB Flash Memory
- 2 KB SRAM
- 1 KB EEPROM
- USB programming interface
- 5V operating voltage
- On-board voltage regulator
Although these specifications look modest compared to modern computers, they are ideal for learning disciplined embedded programming where memory and processing power matter.
Who Should Learn Arduino Uno First?
Arduino Uno is recommended for:
- Engineering students (ECE, EEE, CSE).
- Diploma students.
- IT professionals moving into embedded systems.
- Electronics hobbyists.
- School students interested in robotics.
If you’re completely new to electronics, our Electronics Fundamentals Programme provides the circuit theory needed alongside Arduino programming.
Setting Up the Arduino IDE
The Arduino IDE is the free software used to write, compile, and upload programs to your Arduino board.
Installing the Arduino IDE
Download the latest Arduino IDE from the official Arduino website.
After installation:
- Connect your Arduino Uno using a USB cable.
- Open Arduino IDE.
- Select Tools → Board → Arduino Uno.
- Select the correct COM Port under Tools → Port.
- Leave the programmer settings at their default value.
If no COM port appears, your board likely uses the CH340 USB chip. Install the appropriate USB driver before continuing.
Students learn this complete setup process during the first practical session of our Arduino Programming and Projects Course.
Understanding the Arduino Sketch Window
Arduino source files are called Sketches.
The IDE provides:
- Code editor
- Verify (Compile) button
- Upload button
- Serial Monitor
- Serial Plotter
The Verify button checks your code for errors, while Upload compiles the sketch and transfers it to the Arduino Uno.
The Serial Monitor becomes your primary debugging tool throughout your embedded systems journey.
Arduino Programming Language Basics
Arduino programming uses simplified C++. You don’t need advanced C++ knowledge to begin, but understanding a few core concepts is essential.
The setup() and loop() Functions
Every Arduino sketch contains two mandatory functions.
setup()executes once when the board starts.loop()runs continuously afterwards.
A typical Blink sketch follows this structure:
void setup() {
  pinMode(13, OUTPUT);
  Serial.begin(9600);
}

void loop() {
  digitalWrite(13, HIGH);
  delay(1000);
  digitalWrite(13, LOW);
  delay(1000);
}
This structure closely resembles professional embedded firmware where hardware is initialized once before entering an infinite control loop.
Variables, Functions and Control Flow
Arduino programmers frequently use:
intfloatboolcharbyte
Control statements include:
ifelseforwhileswitch
Keeping loop() short by writing reusable helper functions quickly becomes good embedded programming practice.
Controlling LEDs Using GPIO
GPIO (General Purpose Input/Output) is the foundation of every embedded project.
Your First LED Project
Connect:
- Digital Pin 8 → 220Ω resistor → LED → Ground
The resistor protects both the LED and the microcontroller from excessive current.
Configure the pin as an output using:
pinMode(8, OUTPUT);
Then switch the LED ON and OFF using digitalWrite().
Digital vs PWM Output
Arduino Uno supports two primary output modes.
| Output Type | Description |
|---|---|
| Digital Output | HIGH (5V) or LOW (0V) |
| PWM Output | Variable average voltage using Pulse Width Modulation |
PWM is available on pins 3, 5, 6, 9, 10, and 11 and is commonly used for LED brightness and motor speed control.
Reading Sensors with Arduino Uno
Once your Arduino can control outputs, the next step is reading inputs from sensors.
Digital and Analogue Inputs
Common digital sensors include:
- Push buttons
- IR obstacle sensors
- DHT11 temperature sensor
- DHT22 temperature and humidity sensor
Typical analogue sensors include:
- LDR (Light Dependent Resistor)
- Potentiometer
- Analog temperature sensors
Arduino functions used include:
digitalRead()analogRead()
Building Your First Sensor Project
A simple automatic night lamp combines:
- LDR sensor
- Arduino Uno
- LED output
The Arduino continuously reads ambient light and switches the LED on when the room becomes dark.
Displaying sensor values through the Serial Monitor helps debug and fine-tune threshold values.
Students who complete these projects usually continue into our Internet of Things (IoT) Programme, where Arduino projects become cloud-connected IoT applications.
Ready to move beyond blinking LEDs? Our Bangalore trainers guide you through complete Arduino Uno projects using real hardware from day one. Build sensor-based applications, learn embedded programming, and create a portfolio employers actually value. Join the Arduino Programming Course →
Arduino Uno vs Other Beginner Platforms
| Factor | Arduino Uno | Raspberry Pi | Bare-Metal AVR/PIC | Simulation Only |
|---|---|---|---|---|
| Learning curve | Easy | Moderate | Steep | Easy |
| Real hardware skills | Excellent | Moderate | Excellent | None |
| Time to first project | Less than 1 hour | 2–4 hours | 1–2 days | Less than 1 hour |
| Cost | Low | Higher | Low | Free |
| Best suited for | Absolute beginners | Linux and AI projects | Professional firmware | Theory only |
When Should You Move Beyond Arduino?
Once you can:
- Read datasheets confidently.
- Use I2C and SPI without relying entirely on libraries.
- Debug hardware systematically.
- Write modular firmware.
you are ready to progress toward:
Career Opportunities After Learning Arduino
Arduino itself is only the beginning. Combined with Embedded C, communication protocols, and debugging skills, it becomes the first step toward a professional embedded engineering career.
Typical Entry-Level Roles
- Embedded Software Engineer
- Firmware Engineer
- IoT Developer
- Hardware Test Engineer
- PCB Design Engineer
- Firmware Intern
Entry-level embedded engineering salaries in Bangalore typically range between ₹3.5–6 LPA, with higher salaries available after gaining practical firmware experience. These figures should be verified against current market data.
Building a Portfolio Employers Notice
Employers value working projects more than certificates alone.
Strong beginner portfolio projects include:
- Automatic night lamp
- Temperature monitoring system
- Smart irrigation controller
- Obstacle detection robot
- Home automation prototype
Students who continue into our Embedded Systems Professional Programme build complete capstone projects suitable for technical interviews across Bangalore’s embedded systems industry.
If you’re unsure which learning path suits your goals, contact our training team and we’ll help you choose the right programme.
Frequently Asked Questions
Do I need to know C before learning Arduino Uno?
No. Arduino introduces C++ concepts gradually, making it suitable for complete beginners with no prior programming experience.
Is Arduino IDE free?
Yes. Arduino IDE is completely free and open-source for Windows, macOS, and Linux.
How long does it take to build a first Arduino project?
Most learners build their first LED project within an hour, while sensor-based projects typically take a few weeks of guided practice.
Can I use Arduino Uno clone boards?
Yes. Many affordable clone boards work perfectly after installing the required CH340 USB driver.
Does Arduino experience help on an embedded systems resume?
Yes. Arduino provides practical experience with GPIO, sensors, communication protocols, and debugging, all of which form the foundation for professional embedded systems development.
What should I learn after Arduino?
The next steps typically include Embedded C, register-level programming, communication protocols (I2C, SPI, UART), RTOS concepts, Embedded Linux, and advanced microcontroller platforms.