
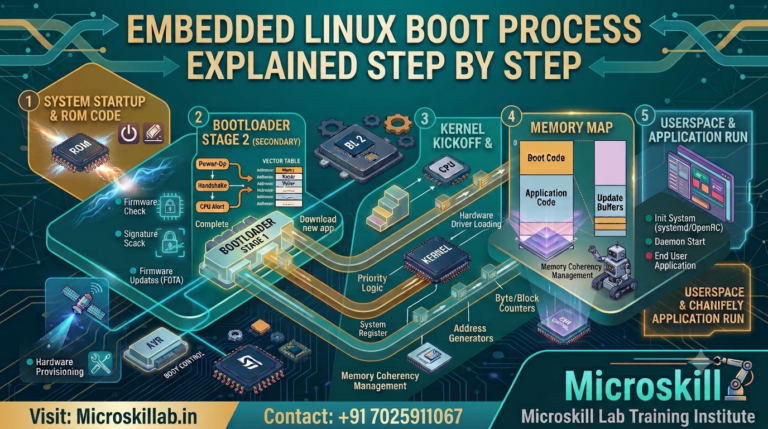
The embedded Linux boot process is the ordered sequence that takes an ARM-based board from power-on to a running Linux system: ROM code loads a bootloader like U-Boot, which initialises hardware and loads the Linux kernel plus a device tree, and the kernel then mounts the root file system and starts user space. For learners and engineering freshers across Bangalore and South India, understanding these four stages is the foundation of every embedded Linux career.
At Microskill Lab Training Institute, we teach this pipeline on real hardware so you can debug boot failures with confidence. This guide breaks down each stage in plain language, with the ARM and U-Boot specifics that interviews in Karnataka’s electronics sector actually test.
⚡ Key Takeaways
- You will understand the four boot stages: ROM code, bootloader, kernel, and root file system, in the correct order.
- You will learn what U-Boot does and why the bootloader is the heart of embedded Linux bring-up.
- You will see how the device tree describes hardware to the kernel without recompiling it.
- You will grasp how the root file system starts user space through the init process.
- You will gain interview-ready clarity on ARM boot flow valued by Bangalore embedded employers.
What Is the Embedded Linux Boot Process?
The embedded Linux boot process is the chain of software steps that transform a powered-off ARM processor into a fully operational Linux system running your application. Unlike a desktop PC with a BIOS or UEFI firmware, an embedded board relies on a compact bootloader and a kernel tailored to its exact hardware. Our trainers describe it as a relay race where each stage does its job, then hands control to the next runner without dropping the baton.
This topic matters for anyone building products on system-on-chip platforms such as the NXP i.MX, Texas Instruments Sitara, or Rockchip families. These chips power industrial gateways, medical devices, and IoT products designed across Electronic City and Whitefield.
Who Should Learn This Topic
This subject suits engineering freshers from ECE, EEE, and CSE backgrounds who want to move beyond microcontrollers into Linux-capable hardware. Working developers migrating from bare-metal Arduino programming projects also benefit from seeing how a full operating system boots. Our curriculum in the embedded Linux development programme assumes only basic C and Linux command-line familiarity before it builds you up.
Career changers from IT roles find this the clearest bridge into hardware, because the concepts map onto software they already know. We start every batch with a live board boot so you watch the theory happen in real time.
Why the Boot Sequence Is Foundational
Every embedded Linux problem you will ever debug touches the boot chain in some way. A board that hangs, a kernel that panics, or a file system that will not mount all trace back to one of these stages. Understanding the sequence turns frightening errors into a checklist you can work through calmly.
Employers in Bangalore’s product companies test this knowledge directly in interviews. We have seen candidates lose offers simply because they could not explain where U-Boot ends and the kernel begins.
Stage One: ROM Code and the Boot ROM
When an ARM processor receives power, it does not run your code first. Instead, it executes tiny, factory-programmed instructions burned into on-chip ROM by the silicon vendor. This boot ROM reads configuration pins or fuses to decide where to find the next piece of software.
The boot ROM is deliberately minimal because it must be permanent and bug-free. Our trainers show learners how to read a vendor reference manual to understand exactly what the ROM expects from the boot media.
How the Boot ROM Finds the Bootloader
The boot ROM checks a defined boot device such as an eMMC, SD card, SPI flash, or a serial download mode. It loads a small first-stage program into on-chip SRAM, because external DRAM is not yet initialised at this point. This constraint explains why embedded Linux uses staged bootloaders rather than one large program.
We walk students through changing boot-mode pins on a development board so they see the ROM pick different sources. This hands-on step removes the mystery that trips up many self-taught learners.
The Secondary Program Loader
Because on-chip SRAM is small, many platforms use a secondary program loader, or SPL, as a lightweight first stage. The SPL initialises the DRAM controller and clocks, then loads the full bootloader into main memory. This two-step design lets a large bootloader run from plentiful DRAM instead of cramped SRAM.
Our embedded Linux development course covers SPL configuration for popular ARM boards used in the Karnataka electronics industry. Learners build and flash their own SPL to cement the concept.
Stage Two: The Bootloader and U-Boot
The bootloader is the most important stage to master because it bridges raw hardware and the operating system. U-Boot, short for Das U-Boot, is the de facto standard bootloader across the embedded Linux world. It initialises hardware, offers a command shell, and ultimately loads the kernel into memory.
U-Boot supports scripting, network booting, and environment variables that control the entire boot flow. Our trainers treat U-Boot fluency as a core employability skill for South India’s embedded job market.
What U-Boot Actually Does
U-Boot sets up remaining peripherals, configures memory, and locates the kernel image on storage or over a network. It reads its environment variables to build the kernel command line, which passes crucial parameters to Linux. It then loads the kernel, the device tree, and optionally an initial ramdisk into DRAM before jumping to the kernel entry point.
We teach learners to use the U-Boot command line interactively, editing variables and booting manually. This builds the muscle memory that separates confident engineers from nervous beginners.
U-Boot Environment and Boot Scripts
The U-Boot environment stores variables such as bootcmd and bootargs that automate booting on every power cycle. Engineers customise these to select storage devices, set the console, or point at a network server during development. A boot script lets teams standardise how every unit in the field starts up.
Our curriculum includes a lab where students write a boot script to load a kernel over TFTP. This mirrors the exact workflow used in professional product development around Manyata Tech Park.
Stage Three: The Linux Kernel and Device Tree
Once U-Boot hands over control, the Linux kernel decompresses itself and begins bringing the system to life. The kernel initialises the CPU cores, memory management, scheduler, and the drivers your hardware needs. It relies on a device tree to learn what hardware exists, because ARM systems cannot probe their components the way a PC can.
This separation of kernel and hardware description is one of embedded Linux’s most elegant ideas. Our trainers spend real classroom time here, since device tree errors are among the most common boot failures.
Understanding the Device Tree
The device tree is a data structure that describes the board’s hardware to the kernel in a standard format. It lists CPUs, memory ranges, buses, and peripherals so a single kernel binary can support many different boards. You edit a device tree source file, compile it to a binary blob, and U-Boot passes it to the kernel at boot.
We give learners a device tree they must modify to enable a new sensor on an I2C bus. This practical exercise makes an abstract concept concrete and interview-ready.
Kernel Initialisation and Drivers
After parsing the device tree, the kernel probes and initialises drivers for each described device. It sets up the console so you finally see kernel boot messages scrolling on the serial terminal. When driver initialisation finishes, the kernel prepares to hand control to the very first user-space program.
Our Embedded Systems Pro programme helps students read these kernel logs to pinpoint exactly which driver failed. Reading a boot log fluently is a skill Bangalore employers value highly.
Ready to boot your first ARM board? Master the full embedded Linux pipeline with hands-on hardware and mentor-led debugging trusted by learners across South India. Our trainers guide you from ROM code to a running shell on real development boards. Enrol in our Embedded Linux Development programme →
Stage Four: The Root File System and Init
The root file system contains every program, library, and configuration file the running Linux system needs. The kernel mounts this file system and then executes the first user-space process, traditionally called init. From this moment, the system is fully booted and ready to run your application.
Without a valid root file system, the kernel panics because it has nothing to run after initialisation. Our trainers teach learners to build minimal root file systems so they understand exactly what each piece provides.
Mounting the Root File System
The kernel locates the root file system using the root parameter from the kernel command line set earlier in U-Boot. The file system may live on eMMC, an SD card, NAND flash, or a network share during development. Some designs use an initial ramdisk to prepare storage before mounting the real root.
We show students how a single wrong root argument stops an otherwise perfect boot. This lesson reinforces how tightly the boot stages depend on one another.
The Init Process and User Space
The init process is the first program the kernel starts, and it becomes the parent of everything else. Modern embedded systems use init systems such as BusyBox init or systemd to bring up services in order. From here, your networking, application, and user interface all come to life.
Our embedded Linux development curriculum has learners configure their own init to launch a custom application. This final step connects the whole boot journey to a working product.
Comparing Boot Storage and Boot Methods
Choosing where to store your bootloader, kernel, and root file system shapes speed, cost, and field reliability. Our trainers help learners weigh these options against real product requirements from Karnataka’s manufacturing sector.
Storage Options at a Glance
Different boot media suit different products, from quick prototypes to rugged industrial units. The table below summarises common choices our students evaluate during projects.
Table: Common Embedded Linux Boot Storage Options
| Boot Media | Typical Use | Strength | Trade-off |
|---|---|---|---|
| SD card | Prototyping, education | Easy to reflash | Less rugged in the field |
| eMMC | Consumer products | Fast and reliable | Soldered, harder to update |
| NAND flash | Industrial devices | Cost-effective at scale | Needs wear management |
| Network (TFTP/NFS) | Development labs | Instant iteration | Needs a host server |
Development Versus Production Booting
During development, engineers boot the kernel over the network and mount the root file system via NFS for rapid iteration. In production, everything moves onto local storage so the unit boots standalone in the field. Understanding both modes is essential for any embedded Linux role.
We structure labs so students experience both a network boot and a fully self-contained boot. This dual exposure mirrors how professional teams actually work in Bangalore product companies.
Careers and Salaries in Embedded Linux
Embedded Linux skills open some of the highest-paying hardware roles in the Indian technology sector. Companies across Bangalore, Hyderabad, and Chennai actively hire engineers who can bring up Linux on custom boards. Our placement support connects learners to this growing demand.
In-Demand Roles and Employers
Product companies, semiconductor firms, and defence electronics units all need embedded Linux talent in South India. Roles include embedded software engineer, board bring-up engineer, BSP developer, and Linux device driver engineer. Large employers such as Bosch, Wipro, and L&T operate significant embedded teams in the region.
- Embedded Linux Engineer
- Board Support Package (BSP) Developer
- Linux Device Driver Engineer
- Firmware and Bring-Up Engineer
Our trainers, drawing on industry experience, prepare you specifically for these interview tracks. We align teaching with the skills these hiring pipelines assess.
Salary Expectations in India
Embedded Linux engineers in Bangalore typically earn ₹5–9 LPA at entry level, rising to ₹15–28 LPA with strong device-driver and BSP experience, as of 2026. These indicative figures vary by employer, location, and individual skill, and should be verified against current market data before you rely on them. Board bring-up and kernel expertise command a clear premium over pure application roles.
- Verify all salary figures against current job listings before planning.
- Expect higher offers in product companies than in services firms.
- Kernel and driver depth raises earning potential significantly.
We guide learners toward the specialisations that carry this premium in the Indian market.
How to Choose an Embedded Linux Training Institute
The right training partner turns abstract boot theory into working hardware skills that employers reward. Learners across Kerala, Tamil Nadu, Telangana, Andhra Pradesh, and Pondicherry should weigh hands-on depth above all else. Our approach centres on real boards, not slideware.
What to Look For in a Programme
A strong embedded Linux course teaches on physical ARM hardware, not only simulators or diagrams. It should cover the full boot chain, from U-Boot through kernel to a custom root file system. Mentor availability and live debugging sessions separate genuine training from recorded video dumps.
Look for a curriculum that ends in a capstone where you boot Linux on a board yourself. Our electronics fundamentals programme also helps those who first need to strengthen their hardware basics.
Why Learners Choose Microskill Lab
We combine structured theory with continuous hands-on practice on real development boards in Bangalore. Our trainers bring practical embedded experience and stay with learners through every debugging challenge. We serve students and professionals across South India with batches designed around working schedules.
If you are ready to start, our team is happy to guide you toward the right programme. Reach out through our enquiry and contact page to discuss batches, prerequisites, and your career goals.
Frequently Asked Questions
What are the four stages of the embedded Linux boot process?
The four stages are the ROM code, the bootloader such as U-Boot, the Linux kernel with its device tree, and the root file system with the init process. Each stage initialises more of the system and hands control to the next. Mastering this order is the foundation of embedded Linux debugging.
Is U-Boot required for embedded Linux?
U-Boot is not strictly mandatory, but it is the most widely used bootloader in the embedded Linux industry. Some platforms use alternatives, yet U-Boot’s flexibility, networking, and scripting make it the practical standard. Learning U-Boot prepares you for the vast majority of real products.
What is a device tree in embedded Linux?
A device tree is a data structure that describes a board’s hardware to the Linux kernel in a standard format. It lets one kernel binary support many boards without recompilation. You compile a device tree source into a binary blob that the bootloader passes to the kernel.
Do I need strong C programming before learning embedded Linux?
Basic C and comfort with the Linux command line are enough to begin our embedded Linux development programme. We build your kernel and driver knowledge from that foundation. Deeper C skill grows naturally as you progress into device drivers.