
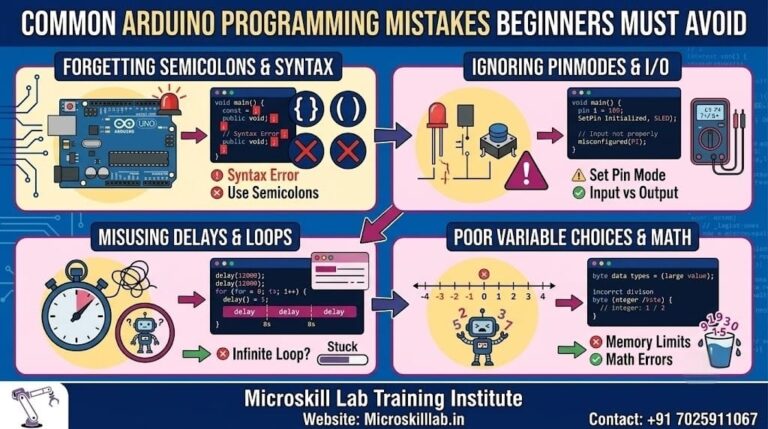
Learning the Arduino programming language becomes far easier once you know which errors trip up almost every beginner. In Bangalore and across India, students who start with Arduino Uno programming often lose hours to the same handful of coding errors. These include missing semicolons, wrong pin modes, blocking delays, and memory overflows. This guide breaks down the most common Arduino mistakes, why they happen, and how our trainers help learners at Microskill Lab Training Institute fix them fast. Whether you build your first LED sketch or a full IoT project, avoiding these traps saves time and keeps you motivated to keep learning electronics. Every mistake here is one our beginner batches in Bangalore work through in their first practical sessions, so you are in good company.
⚡ Key Takeaways
- Identify the syntax errors that cause most failed Arduino IDE compilations before you upload.
- Understand why
delay()blocks your Arduino Uno and how non-blocking timing fixes it. - Learn correct
pinMode()and wiring habits that prevent silent hardware failures. - Master serial debugging so you can trace coding errors instead of guessing.
- Avoid memory pitfalls that crash Arduino projects on limited SRAM.
- See how structured training in Bangalore shortens your path from beginner to confident builder.
Syntax Errors That Break Your First Sketch
Most beginners meet the Arduino IDE for the first time and immediately hit red compiler text. These messages look intimidating, but almost all early failures trace back to a small set of syntax slips. Our trainers in Bangalore see the same culprits in nearly every first batch: forgotten semicolons, mismatched braces, and mistyped function names. Learning to read the IDE’s error line number is the single fastest debugging skill you can build. Once you recognise the pattern, that wall of red text turns into a simple checklist you can clear in seconds.
Missing Semicolons and Braces
Every C++ statement in the Arduino programming language ends with a semicolon, and every code block needs matching curly braces. When you forget one, the Arduino IDE reports an error on the next line, which confuses beginners into fixing the wrong spot.
We teach students to read upward from the flagged line. In our hands-on Arduino Programming Course, learners practise spotting these errors until the pattern becomes automatic within the first week.
Case Sensitivity and Typos
The Arduino language is case-sensitive, so digitalWrite() works but digitalwrite() fails. Beginners often mix up variable names or call functions with the wrong capitalisation, then struggle to see why the sketch will not compile.
Reading the exact spelling in the error message solves most of these problems. The Arduino IDE also highlights recognised keywords in colour, so a function name that stays plain text is often a spelling clue.
Students across Karnataka, Kerala, and Tamil Nadu who join our Electronics Fundamentals Programme learn to slow down and match names precisely before uploading.
Wiring and pinMode Mistakes That Cause Silent Failures
A sketch can compile perfectly and still do nothing, which frustrates new learners the most. These silent failures usually come from hardware setup rather than code logic. In our Bangalore labs at Electronic City, we watch beginners wire an LED without a resistor or forget to declare a pin as an output. Understanding the link between your setup() code and the physical board is essential to real Arduino Uno programming.
Forgetting pinMode() in setup()
The pinMode() function tells the Arduino whether a pin reads input or drives output. Beginners frequently skip this line, then wonder why their LED stays dark or their button never responds.
Every pin you use needs its mode set inside setup() before the main loop runs. Making this a routine first step removes one of the most common silent-failure sources for beginners.
Our trainers walk each student through a checklist so this step becomes second nature during the first practical session with real components.
Floating Inputs and Missing Resistors
An unconnected input pin floats and reads random electrical noise, producing unpredictable behaviour that baffles beginners. Buttons need pull-up or pull-down resistors, and the Arduino Uno offers a built-in INPUT_PULLUP mode that can remove the need for an external resistor in many button circuits.
Beginners who understand this rarely chase phantom button glitches again.
Skipping current-limiting resistors on LEDs can also damage components and stress microcontroller pins over time. In our PCB Designing Programme, learners connect these wiring fundamentals to proper circuit design, building habits that carry into every future electronics project.
The delay() Trap and Blocking Code
The delay() function is the first timing tool beginners reach for, and it quickly becomes their biggest limitation. While delay() pauses everything, your Arduino cannot read sensors, check buttons, or respond to events. This blocking behaviour turns simple multitask sketches into impossible puzzles for new learners.
Moving beyond delay() is a defining moment in every student’s Arduino journey. It marks the shift from writing one-thing-at-a-time sketches to thinking like an embedded developer who manages several tasks at once.
Why delay() Blocks Everything
When you call delay(1000), the microcontroller waits for a full second before continuing. During that time, your sketch does not process the next instructions in loop().
Beginners building a blinking LED and a responsive button discover that the button feels dead during each pause. This confusion is universal in our first batches. Our trainers demonstrate the problem live so students understand exactly why blocking code limits Arduino projects before we introduce the solution.
Non-Blocking Timing with millis()
The millis() function tracks elapsed time without freezing the board, allowing several tasks to progress during the same main loop.
Learning this pattern separates hobby tinkering from real embedded thinking. It feels harder at first, but it unlocks responsive multitasking on the Arduino Uno.
Students who progress into our Embedded Systems Pro Programme rely on non-blocking timing constantly, so we build the habit early during beginner training in Bangalore.
Ready to move past trial-and-error coding? Build real debugging confidence with structured, hands-on guidance from experienced mentors who have trained learners across South India. Our practical labs turn common Arduino mistakes into lasting skills. Explore our Arduino Programming Course →
Serial Monitor and Debugging Habits
Many beginners guess at what their code does instead of watching it run, which slows learning dramatically. The Arduino IDE’s Serial Monitor is the most powerful and underused debugging tool for newcomers.
In our Bangalore training sessions, we insist that students print variable values early and often. This single habit transforms how quickly learners find and fix coding errors in their sketches. It replaces frustrating guesswork with clear evidence of what the code is actually doing on the board.
Using Serial.begin() and Serial.print()
To begin serial debugging, call Serial.begin(9600) inside setup(). You can then use Serial.print() and Serial.println() to display values while the program runs.
Beginners often forget to start serial communication or select a baud rate in the Serial Monitor that does not match the value used in Serial.begin(). This creates garbled text.
Matching the baud rate in the monitor resolves the problem immediately. We ask every learner to confirm the baud rate first whenever serial output appears as unreadable symbols.
Our trainers make serial debugging one of the first skills in every practical Arduino session for new students.
Reading Values to Trace Errors
Printing sensor readings, timer values, button states, and other variables shows you exactly where a sketch begins behaving unexpectedly.
Instead of guessing, beginners learn to follow the real data through their code. This evidence-based approach is central to how professional embedded engineers work.
Learners in our Internet of Things Programme use serial output constantly to verify that connected devices are collecting and transmitting the correct readings before deployment.
Variable, Data Type, and Memory Mistakes
The Arduino Uno has very limited memory, so careless variable use causes crashes and erratic behaviour that puzzle beginners. Choosing the wrong data type or overusing dynamic strings can quietly consume the board’s small SRAM.
New learners rarely think about memory until a sketch begins resetting or behaving unpredictably. Understanding data types early prevents a whole category of hard-to-trace coding errors, especially when projects move from simple LED sketches to data logging and sensor work.
Choosing the Right Data Type
Using an int where a byte would be sufficient, or using float when integer calculations would work, wastes memory and processing time.
Beginners often default to int for every variable without considering the range of values they actually need. Matching the data type to the data conserves scarce resources.
In our Electronics Fundamentals Programme, students learn how each data type maps to memory on real microcontroller hardware.
Managing SRAM and String Overuse
The Arduino String object is convenient, but repeated dynamic string operations can fragment the Uno’s limited SRAM and contribute to random resets or unstable behaviour in long-running sketches.
Beginners building data-logging or IoT projects may encounter this problem without understanding the cause.
Using character arrays where appropriate and the F() macro for fixed text helps keep constant strings out of scarce SRAM.
For example:
Serial.println(F("System started successfully"));This is the kind of professional memory-management habit that pays off in larger connected-device projects. Our trainers show learners how professionals manage constrained resources, a skill that remains useful as they progress into more advanced embedded and Embedded Linux Development work.
Comparing Beginner Habits with Trained Practice
New Arduino learners often develop trial-and-error habits that feel productive but slow long-term progress. Structured training replaces guessing with repeatable methods that scale to more complex projects.
The table below contrasts common self-taught patterns with the disciplined approach we teach across our Bangalore and South India batches. Recognising your own habits in the left column is the first step toward adopting the practices on the right.
Self-Taught Versus Structured Learning
| Common Beginner Habit | Structured Approach We Teach | Why It Matters |
|---|---|---|
| Guessing at errors | Reading IDE error lines carefully | Faster and more accurate debugging |
Using delay() everywhere |
Using non-blocking millis() timing |
Allows responsive multitasking |
| Skipping serial prints | Starting with serial debugging | Makes coding errors traceable |
| Ignoring memory limits | Choosing data types deliberately | Creates stable Arduino projects |
| Copying code blindly | Understanding every important line | Builds transferable programming skills |
| Changing many things at once | Changing and testing one variable at a time | Identifies the true cause of failures |
| Ignoring wiring diagrams | Documenting pin connections before coding | Prevents silent hardware mistakes |
Building Habits That Last
Good habits formed early carry into every future embedded and IoT project. Our trainers focus on the reason behind each rule so students can adapt when the hardware or project requirements change.
This mindset matters far more than memorising individual fixes. A learner who understands why blocking code fails can solve related problems we never explicitly taught.
Learners who build these foundations move confidently toward advanced work in our PIC Microcontroller Programming Course and beyond.
Your Path from Beginner Mistakes to Real Projects
Every experienced embedded engineer once made these Arduino mistakes, so early errors are a normal part of learning electronics. What separates fast learners is structured practice, honest debugging, and mentorship.
Across Karnataka and neighbouring states, demand for hands-on embedded skills continues growing in Bangalore’s technology corridors. Turning beginner errors into strong fundamentals is one of the surest ways to reach real, employable capability.
Employers across Manyata Tech Park and the wider Karnataka electronics sector value engineers who can debug methodically rather than by luck.
Salary and Career Context in India
Embedded and IoT roles in Bangalore offer competitive starting salaries. Entry-level embedded developers reportedly earn approximately ₹3.5–6 LPA, while experienced engineers may earn ₹8–15 LPA depending on specialisation and project depth.
These figures are indicative and should be verified against current job-market data before publication.
Companies across Whitefield and Electronic City hire for embedded talent in roles such as:
- Embedded Systems Engineer.
- IoT Developer.
- Firmware Developer.
- Hardware Test Engineer.
- PCB Design Engineer.
Our learners progress from beginner sketches toward these opportunities through consistent, mentored practice.
Start Learning the Right Way
The fastest way past beginner mistakes is guided, hands-on training with real hardware and real feedback. You avoid months of frustration and build habits that professionals actually use.
Structured mentorship also helps learners stay motivated when compiler errors, wiring faults, and failed uploads feel overwhelming.
If you are ready to start, talk to our team about the right course and begin building with confidence.
Frequently Asked Questions
What is the most common Arduino programming mistake for beginners?
The most common mistakes include overusing the delay() function, forgetting semicolons, skipping pinMode() declarations, and selecting the wrong board or port in the Arduino IDE. Learning to read error messages and using the Serial Monitor solves many early problems quickly.
Do I need to know C++ before learning Arduino Uno programming?
No. You can begin Arduino programming with no prior coding experience because the Arduino environment simplifies many C++ concepts. Beginners can learn syntax gradually through practical sketches and hardware exercises.
How long does it take to get past beginner Arduino mistakes?
With consistent practice and good debugging habits, many learners become comfortable within a few weeks. Structured training accelerates this process by correcting errors before they turn into long-term habits.
Why does my Arduino sketch compile but not work?
This usually points to a wiring, pin assignment, power, or pinMode() problem rather than a syntax error. Floating inputs, missing resistors, wrong pin numbers, or absent shared grounds can cause silent failures.
Why does my button reading change randomly?
The input pin is probably floating. Use an external pull-up or pull-down resistor, or configure the pin using INPUT_PULLUP and wire the button appropriately.
Why does my Arduino reset randomly?
Random resets may result from unstable power, a motor drawing excessive current, SRAM exhaustion, dynamic String fragmentation, or a wiring short. Monitor memory use, separate high-current loads from the board supply, and simplify the sketch to isolate the cause.
Why should I use millis() instead of delay()?
millis() allows your program to track elapsed time without stopping the rest of the sketch. This lets the Arduino continue reading buttons, sensors, and communication interfaces while managing timed actions.