
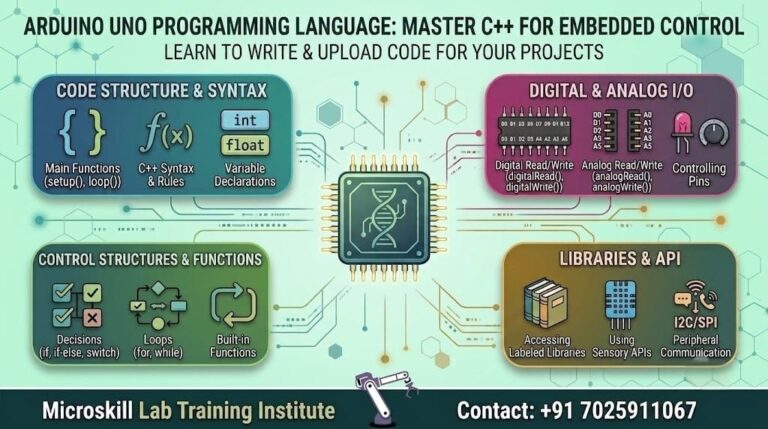
Arduino Uno Programming Language: A Beginner’s Guide
The Arduino Uno programming language is a simplified form of C++, written and uploaded through the free Arduino IDE. Beginners in Bangalore and across South India can start writing working code within a single afternoon because the language hides most of the complexity that makes raw embedded C++ intimidating. You write two core functions, upload your sketch over USB, and watch the microcontroller respond immediately. We teach this exact starting point to ECE, EEE, and CSE students at our Bangalore campus every month. The pattern never changes: the first blinking LED removes the fear, and everything else follows naturally.
⚡ Key Takeaways
- You learn that the Arduino Uno programming language is C++ with a beginner-friendly wrapper, so nothing you learn here is wasted later.
- You gain a clear map of the Arduino IDE, from board selection to Serial Monitor, without guesswork.
- You understand variables, data types, and functions well enough to read and modify any beginner sketch you find online.
- You see how Arduino skills connect to real embedded roles in Bangalore’s hardware and IoT sector.
- You avoid the six mistakes that stall most self-taught beginners in their first month.
- You get a structured progression path from Arduino sketches to professional microcontroller programming.
What Is the Arduino Uno Programming Language?
C++ Underneath, Simplicity on Top
The honest answer surprises most beginners: there is no separate Arduino language. What you write is C++, compiled by the same GNU toolchain that professional embedded engineers use, then linked against a library that hides the register-level configuration. The Arduino team wrapped the difficult parts in readable function names so that a first-year student can toggle a pin without reading a 400-page datasheet. This matters more than it sounds because it means every hour you spend on Arduino programming builds directly toward professional Embedded C and C++ work.
When you call digitalWrite(13, HIGH), the compiler translates that into direct manipulation of the ATmega328P’s port registers. You never see the register names, but they are there, and understanding this early keeps you from treating Arduino as a toy. Our trainers deliberately show learners the generated register operations in the second week because that single reveal converts a hobbyist mindset into an engineering one. Students who understand this layer transition into serious microcontroller work far faster than those who do not.
Why Beginners Start Here
The Arduino Uno remains the standard entry board for good reasons that have not changed in a decade. It survives wiring mistakes that would destroy more delicate boards, it needs no external programmer, and its community has answered essentially every beginner question that exists. For students in Karnataka, Kerala, and Tamil Nadu working through their own budget, a genuine Uno or a reliable clone costs less than a textbook. That accessibility is why our Electronics Fundamentals Programme uses the Uno as its teaching platform before learners move to industrial hardware.
We see a consistent pattern among engineering students across South India who try to skip this stage. They jump straight to ARM Cortex boards, hit a wall of vendor toolchains and clock configuration, and lose weeks of momentum. Starting with the Arduino Uno programming language builds the mental model first, so that when the complexity arrives, you already know what the code is supposed to be doing. The board is a learning device, not a destination, and that distinction is the whole point.
Setting Up the Arduino IDE
Installation and First Configuration
The Arduino IDE is free, runs on Windows, macOS, and Linux, and installs in a few minutes on any machine a student is likely to own. After installation, you connect the Uno by USB and configure two settings before writing a single line: the board type and the communication port. Selecting the wrong board is the single most common reason a beginner’s first upload fails, and it produces an error message that explains nothing useful. We walk every learner through this configuration on their own laptop during the first session. A setup problem on day one discourages people out of all proportion to its difficulty.
Once configured, the IDE gives you a Verify button, an Upload button, and a Serial Monitor. That is genuinely all you need for months of productive learning. The interface deliberately looks basic compared with professional IDEs, and that restraint is a feature rather than a limitation. Our curriculum keeps beginners inside this environment until the workflow becomes automatic, then introduces professional tooling once the fundamentals are secure.
Understanding the Sketch Structure
Every Arduino program, called a sketch, contains exactly two mandatory functions, and this structure never varies. The setup() function runs once when the board powers on or resets, and you use it to configure pin modes, start serial communication, and initialise any hardware you have attached. The loop() function runs immediately afterwards and repeats forever until power is removed, which is where the actual behaviour of your device lives. Understanding this two-part rhythm is the conceptual key to the entire Arduino Uno programming language.
This structure mirrors how real embedded firmware is organised, which is why it transfers so cleanly to professional work. Production firmware also has an initialisation phase followed by an infinite main loop, though the details grow considerably more sophisticated. Beginners who internalise the setup-and-loop pattern find that their first exposure to a commercial embedded codebase feels familiar rather than alien. That familiarity is worth far more than the syntax itself.
Variables and Data Types in Arduino Programming
Choosing the Right Type
Variables in Arduino programming follow standard C++ rules, but the constrained hardware makes your choices genuinely consequential. The ATmega328P on the Uno has only two kilobytes of SRAM, so declaring a large array carelessly will exhaust the board’s memory and cause bizarre, hard-to-diagnose behaviour. An int occupies two bytes, a long occupies four, and a byte occupies one. Selecting the smallest adequate type is therefore a real optimisation rather than pedantry. We drill this discipline early because habits formed on the Uno persist into professional embedded work where memory budgets remain tight.
Beginners frequently reach for float because it feels safe and general-purpose, without realising that the Uno has no hardware floating-point unit. Every floating-point operation is emulated in software, consuming both program space and execution time that a fixed-point alternative would not. This is exactly the kind of hardware-aware reasoning that separates someone who can copy a sketch from someone who can engineer a product. Our Arduino Programming Course builds these instincts through deliberate memory-constrained exercises rather than abstract explanation.
Scope, Constants, and Common Traps
Where you declare a variable determines what can see it and how long it survives, and this trips up beginners constantly. A variable declared inside loop() is created fresh on every iteration, so it cannot remember anything between passes, which is why counters must be declared globally or as static. Understanding this rule solves an entire category of confusing bugs that otherwise feel supernatural. We spend real classroom time on scope because the alternative is watching students debug the same misunderstanding repeatedly for weeks.
Constants deserve equal attention because pin numbers scattered as raw digits throughout a sketch make later modification painful and error-prone. Using const int LED_PIN = 13; at the top of your sketch costs nothing and makes rewiring a single-line change rather than a search-and-replace hunt. Professional codebases enforce this convention rigorously, and adopting it while your programs are still twenty lines long makes it automatic later. Small disciplines compound, particularly in embedded work where debugging tools are limited.
Functions: The Core of Every Arduino Sketch
Built-In Functions You Will Use Daily
The Arduino Uno programming language provides a compact set of built-in functions that handle almost everything a beginner needs, and learning them properly is more valuable than memorising syntax. Pin control comes from pinMode(), digitalWrite(), and digitalRead(), while analogue work uses analogRead() and analogWrite(). Timing relies on delay() and millis(), and serial communication depends on Serial.begin() and Serial.println(). This handful of functions covers the overwhelming majority of introductory Arduino projects, which is precisely why the platform is so approachable.
The distinction between delay() and millis() deserves particular emphasis because it is where beginner code stops scaling. A delay() call freezes the entire microcontroller, meaning it cannot read a sensor or respond to a button during that pause. Learning to structure timing with millis() instead is the moment a beginner starts writing code that could plausibly run in a real product. Our trainers introduce this transition deliberately because it is one of the clearest markers of genuine progress.
Writing Your Own Functions
Once your sketches grow past fifty lines, cramming everything into loop() becomes unmanageable and unreadable. Writing your own functions lets you name a block of behaviour, test it in isolation, and reuse it without duplication. A function that reads a temperature sensor can be swapped for a different sensor without touching the rest of your sketch. That is exactly how modular firmware is built professionally. This habit matters far more than any individual piece of syntax you will learn.
Function parameters and return types are ordinary C++, so everything you practise here applies directly to larger embedded projects. Learners who progress from Arduino into our Embedded Systems Pro Programme find that their function-writing discipline transfers completely, even as the hardware and toolchain change entirely. The syntax of C++ is genuinely portable across the embedded world, which is why the time investment is so well protected. Nothing you learn writing Arduino functions becomes obsolete.
Comparison: Arduino IDE vs Professional Embedded Toolchains
How the Two Approaches Differ
Beginners often ask whether the Arduino IDE and the Arduino Uno programming language count as real development or a training-wheels environment they should abandon quickly. The honest answer is that it is a legitimate tool with deliberate limitations, and understanding those limitations tells you exactly when to move on. The table below compares the beginner environment with the professional toolchains our advanced learners eventually use.
| Aspect | Arduino IDE | Professional Embedded Toolchain |
|---|---|---|
| Setup Time | Minutes | Hours to days |
| Hardware Abstraction | Fully abstracted | Direct register access |
| Debugging | Serial print statements | Hardware breakpoints, JTAG, or SWD |
| Memory Visibility | Limited | Full memory map and linker control |
| Best Suited For | Learning, prototyping, and hobby projects | Production firmware and certified products |
| Language | C++ with simplified core libraries | C, C++, and sometimes assembly |
| Learning Curve | Gentle | Steep |
When to Graduate Beyond the IDE
You should stay in the Arduino IDE until its constraints actively block something you are trying to build, and not a moment before. Common triggers include needing hardware debugging, requiring real-time guarantees, or running out of memory on a board that should have plenty. Recognising these signals is itself a skill, and rushing the transition before you can identify them wastes time you could have spent building fundamentals. The IDE is not holding you back until it is, and most beginners misjudge that boundary badly.
Ready to move from blinking LEDs to building real embedded products? Our trainers guide you from your first Arduino sketch to industry-grade microcontroller firmware, with hands-on hardware in every session at our Bangalore campus. Explore our Arduino Programming Programme →
Career Value: Arduino Skills in Bangalore’s Embedded Sector
What Employers Actually Look For
Nobody in Electronic City or Whitefield is hiring engineers simply to write Arduino sketches, and pretending otherwise would be dishonest. What hiring managers do look for is demonstrated hardware fluency: evidence that you have wired circuits, read datasheets, debugged timing problems, and completed something that physically works. Arduino projects are the most accessible way for a student to accumulate that evidence, and a well-documented portfolio of working builds carries real weight in a fresher interview. We see this repeatedly with learners moving into Bangalore’s embedded and IoT hiring market.
The transition from Arduino to employable embedded engineer requires deliberate progression, and this is where most self-taught beginners stall. They accumulate dozens of sketches without ever touching an RTOS, a communication protocol, or a hardware debugger, and their portfolio plateaus. Structured progression through our Internet of Things Programme or Embedded Systems Pro Programme closes exactly that gap because it forces exposure to the tools that appear in actual job descriptions.
Salary Context and Realistic Expectations
Entry-level embedded roles in Bangalore typically advertise around ₹3.5–6 LPA for freshers. Experienced embedded engineers command considerably more depending on domain and skill depth. These figures move with market conditions and should be verified against current listings before you make career decisions based on them.
Arduino skill alone does not command a salary; it is the foundation on which employable skills are built. Being clear-eyed about that distinction saves beginners from disappointment and misdirected effort.
The realistic path runs from Arduino fundamentals through Embedded C, communication protocols, and RTOS concepts, and it takes months rather than weeks. Learners who accept that timeline and work through it systematically consistently outperform those chasing shortcuts. Karnataka’s hardware and IoT sector continues to hire steadily, and the candidates who succeed are those who can demonstrate depth rather than breadth. There is no version of this where the fundamentals can be skipped.
Common Beginner Mistakes and How to Avoid Them
The Six Errors We See Most Often
After years of teaching the Arduino Uno programming language to beginners across South India, the same mistakes recur with remarkable consistency. Almost all of them are avoidable with a single warning at the right moment.
- Selecting the wrong board or port in the IDE, then assuming the code is broken.
- Forgetting
pinMode()insetup(), so a pin never behaves as an output. - Using
=instead of==inside anifstatement, creating a bug the compiler may not flag clearly. - Overusing
delay()until the sketch cannot respond to anything else. - Powering a motor directly from an Arduino pin, which exceeds the current limit and can damage the board.
- Copying sketches without reading them, so nothing is learned and nothing can be debugged.
Building Good Habits Early
The habits that prevent these errors are cheap to adopt while your programs are small and expensive to retrofit later. Read every line of any sketch you copy, use the Serial Monitor to verify your assumptions rather than guessing, and change one thing at a time when debugging. These sound obvious written down, yet the majority of stalled beginners are violating at least one of them right now. Discipline compounds far more reliably than talent in embedded work.
Documentation is the habit most beginners skip and most regret skipping. Writing a comment explaining why a line exists, not simply what it does, turns your own sketches into a resource you can return to months later. Professional embedded teams treat this as non-negotiable, and the reason becomes clear the first time you inherit undocumented firmware. Start now while the cost of the habit is nearly zero.
Your Learning Path from Arduino to Embedded Engineering
A Realistic Progression
The route from your first blinking LED to professional embedded development is well mapped, and the main risk is impatience rather than difficulty.
- Learn Arduino fundamentals, including GPIO, variables, functions, and the Arduino IDE.
- Add sensors, actuators, displays, and practical hardware projects.
- Learn communication protocols such as I2C, SPI, and UART.
- Move into Embedded C and register-level microcontroller programming.
- Study advanced platforms such as PIC, STM32, and ARM Cortex-M.
- Learn RTOS concepts, multitasking, timing, and shared-resource management.
- Progress into Embedded Linux, IoT, automotive, industrial automation, or another specialisation.
Each stage builds directly on the previous one, and skipping stages produces gaps that surface painfully in technical interviews.
Hardware-design knowledge belongs on this path too because embedded engineers who understand circuits and PCB layout are consistently more valuable than those who only write code. Learners frequently pair their programming track with our PCB Designing Programme for precisely this reason. The combination of firmware skill and hardware literacy is what separates a competent embedded engineer from a generic programmer.
Getting Structured Support
Self-teaching Arduino is entirely possible, and many good engineers began exactly that way with nothing but a board and the internet. What self-teaching rarely provides is correction, structure, and the honest feedback that tells you your approach is wrong before you have spent three months on it.
Our Bangalore campus exists to compress that timeline through hands-on lab time and trainers who have built production embedded systems themselves. If you are unsure where you currently stand, talk to our team and we will map a path from where you are.
Beginners across Karnataka, Kerala, Tamil Nadu, Telangana, and Andhra Pradesh join our programmes at widely different starting points, and that variation is normal rather than embarrassing. Some arrive having never written a line of code, while others have completed a semester of C but have no hardware exposure. The curriculum accommodates both because the fundamentals of the Arduino Uno programming language are learnable by anyone willing to put in the practice hours.
Frequently Asked Questions
Is the Arduino programming language the same as C++?
The Arduino programming language is C++, compiled with a standard C++ compiler, but with a simplified core library layered on top. That library hides register-level hardware configuration behind readable function names such as digitalWrite() and analogRead(). Everything you learn about C++ syntax, functions, variables, and control flow transfers directly to professional embedded development. The language is not different; only the level of abstraction is.
Do I need to know C++ before starting Arduino?
No prior C++ knowledge is required, and most of our beginners start with none at all. The Arduino Uno programming language is designed so that you learn the necessary C++ concepts as you need them, in the context of hardware that visibly responds to your code. That feedback loop makes the language far easier to absorb than studying C++ in the abstract. Beginners typically write their first working sketch within an hour.
How long does it take to learn the Arduino programming language?
You can write basic working sketches within a few days of consistent practice and reach genuine comfort with variables, functions, and sensors within a few weeks. Reaching a level that supports employable embedded skills takes several months of structured work beyond that point. The Arduino stage itself is short; what follows it is where the real depth lies. Consistency matters considerably more than intensity.
What can I build with an Arduino Uno?
Beginners commonly build temperature monitors, automated plant-watering systems, line-following robots, home-automation controllers, and simple data loggers. The Uno’s limits appear when you need heavy computation, large memory, or wireless connectivity, at which point you move to a more capable board. For learning fundamentals, those limits are not a real constraint. The board is deliberately modest, and that modesty is educationally useful.
Is the Arduino IDE enough, or do I need something more advanced?
The Arduino IDE is entirely sufficient for beginners and for most hobby and prototyping work. You should move to a professional toolchain when you need hardware debugging, tighter memory control, or real-time guarantees the Arduino core cannot provide. Recognising when you have reached those limits is itself a skill worth developing. Moving too early simply adds friction without adding useful capability.
Can Arduino skills help me get a job in Bangalore?
Arduino skill alone is not a hiring qualification, but it is the foundation that employable embedded skills are built on. Hiring managers in Bangalore’s embedded sector look for demonstrated hardware fluency, protocol knowledge, and debugging ability, all of which begin with Arduino projects. A documented portfolio of working builds carries real weight in fresher interviews. The board opens the door; structured progression helps you walk through it.