
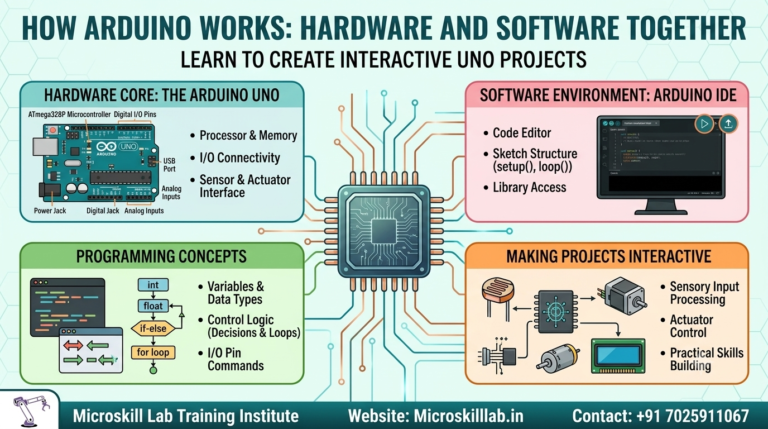
Arduino works by pairing a small microcontroller board with a simple programming environment, so that code written on a laptop directly controls voltage on physical pins. The Arduino Uno reads inputs from sensors and switches, then drives outputs such as LEDs, motors, and displays according to the instructions you upload. For engineering students across Bangalore, Kerala, Tamil Nadu, and Andhra Pradesh, this pairing is usually their first genuine encounter with embedded systems.
⚡ Key Takeaways
- You will understand exactly how an Arduino Uno turns uploaded code into measurable voltage on a GPIO pin.
- You will learn what the Arduino IDE actually does when you press Verify and Upload.
- You will see how the Arduino programming language relates to C and C++ used in professional embedded work.
- You will know how sensors, actuators, and power rails connect safely to a microcontroller.
- You will be able to move from Arduino prototyping toward industry-grade embedded systems roles in Karnataka and South India.
- You will avoid the beginner mistakes that damage boards and stall student projects.
What Is Arduino and Why Engineering Students Start Here
Arduino is an open-source electronics platform built around an easy-to-use microcontroller board and a matching software environment. The platform removes most of the setup work that traditionally stood between a student and a working circuit, which is why it dominates first-year and second-year engineering labs. Rather than configuring registers by hand on day one, you write a few readable lines of code and watch an LED respond immediately.
That immediacy matters enormously for learning. When a student sees code produce a physical result within minutes, the abstract idea of a microcontroller becomes concrete and memorable. Our trainers use this early success deliberately, then gradually pull back the abstraction layers until learners are reading datasheets and touching registers directly.
The Board and the Environment Are One System
An Arduino is really two things working in partnership. The hardware side is a printed circuit board carrying a microcontroller, a voltage regulator, a USB interface chip, and headers that expose the microcontroller pins. The software side is the Arduino IDE, a desktop application that turns your source code into a binary file the microcontroller can execute.
Neither half is useful alone. A bare Arduino Uno sitting on a bench does nothing until firmware is loaded onto it, and a sketch on your laptop is inert until it reaches the chip. Understanding how the two connect is the entire subject of this article, and it is the foundation of every embedded system you will later build professionally.
Who Arduino Is Designed For
Arduino was created for people who need results before they need theory. It suits ECE, EEE, CSE, mechatronics, and instrumentation students who want to prototype quickly, and it equally suits hobbyists building home automation or robotics projects. In Bangalore engineering colleges, Arduino is now standard for mini-projects, hackathons, and final-year capstone work.
It is not, however, the endpoint of an embedded career. Production products in Electronic City and Whitefield generally run on bare-metal C or an RTOS, on chips from ST, NXP, Microchip, or Texas Instruments. Arduino is the on-ramp, and our Electronics Fundamentals Programme is where students consolidate the circuit theory that makes the on-ramp safe to drive.
Inside the Arduino Uno: The Hardware Explained
The Arduino Uno is deliberately unglamorous hardware, and that is a strength. Every important component is visible, labelled, and traceable with a multimeter, which makes it an excellent teaching board. Once you can point to each block and explain its job, most of the mystery around microcontrollers dissolves.
The Uno is built around the ATmega328P, an 8-bit microcontroller running at 16 MHz. It carries 32 KB of flash memory for your program, 2 KB of SRAM for runtime variables, and 1 KB of EEPROM. Those numbers sound small, and they are, but they force disciplined coding habits that serve you well later.
The Microcontroller at the Centre
The ATmega328P contains a CPU core, memory, and peripheral hardware on a single silicon die. Its peripherals include timers, an analogue-to-digital converter, a serial communication unit, and the port controllers that drive the GPIO pins. Everything the board does ultimately comes from this one chip.
Every other component exists to serve the microcontroller. A voltage regulator holds the supply at a stable 5 V, a crystal clock keeps the CPU predictable, and a USB-to-serial bridge reaches a chip lacking native USB. We spend real bench time on this in our Arduino Programming Course, because students who understand the support circuitry stop damaging boards.
Pins, Power, and What the Headers Actually Expose
The headers around the edge of the board are simply the microcontroller’s pins brought out to a convenient connector. The Uno gives you fourteen digital I/O pins, six of which support PWM output, plus six analogue input pins that feed the internal ADC. Power headers supply 5 V, 3.3 V, and ground, alongside the VIN pin for an unregulated external supply.
Two limits matter more than any others for beginners. Each I/O pin can safely source or sink about 20 mA, and the entire chip should stay under roughly 200 mA in total. Exceeding these numbers is the single most common way students in our labs destroy their first board.
Arduino Uno Hardware at a Glance
- Microcontroller: ATmega328P, 8-bit, 16 MHz.
- Flash memory: 32 KB, storing your compiled program.
- SRAM: 2 KB, holding variables while the program runs.
- Digital I/O: 14 pins, 6 with PWM capability.
- Analogue inputs: 6 pins, 10-bit ADC resolution.
- Operating voltage: 5 V logic, tolerant of 7–12 V on VIN.
How GPIO Pins Control the Physical World
GPIO stands for general-purpose input/output, and it is the mechanism by which software becomes electricity. When you set a pin as an output and write it high, the microcontroller connects that pin internally to the 5 V rail. When you write it low, the pin is connected to ground instead.
This is the whole trick, and it is that simple at the physical layer. An LED lights because you placed 5 V across it through a resistor, and a motor spins because a transistor you switched on allowed current to flow. The code did not move anything; it changed a voltage, and the circuit did the rest.
Digital Input and the Pull-Up Resistor Problem
Reading a pin is the reverse operation. Configured as an input, the pin samples its voltage and reports whether it sits closer to 5 V or to ground. A pressed button connecting the pin to ground therefore reads as low, which surprises students who expect a press to read as high.
A pin left unconnected is a genuine trap. Its voltage floats unpredictably, picking up mains hum and stray charge, so readings flicker between high and low with no input at all. The fix is a pull-up or pull-down resistor, and the ATmega328P has internal pull-ups you can enable in software with a single argument.
Analogue Input and PWM Output
The physical world is rarely binary, so the Uno includes a 10-bit ADC on six pins. It converts an input voltage between 0 V and 5 V into an integer between 0 and 1023, which is how a potentiometer or temperature sensor speaks to your program. Each conversion takes roughly 100 microseconds, which is ample for student projects.
True analogue output does not exist on the Uno, so PWM stands in for it. The chip switches a pin between high and low very rapidly, varying the proportion of time it spends high. An LED driven this way appears dimmed and a motor runs slower, because both respond to average voltage rather than instantaneous voltage.
The Arduino IDE: What Happens When You Click Upload
The Arduino IDE looks like a plain text editor with two buttons, and that simplicity conceals a genuine embedded toolchain. Behind Verify and Upload sit a preprocessor, a C++ compiler, a linker, and a flashing utility, all configured for you. Learning what each stage does is the difference between a student who copies sketches and an engineer who debugs them.
Understanding the pipeline also explains most of the errors you will meet. A red message during Verify is a compile-time problem in your code, while a failure during Upload is almost always a hardware, port, or board-selection problem. Knowing which half of the process broke halves your debugging time immediately.
From Sketch to Binary
Your .ino file is not quite valid C++, so the IDE quietly transforms it first. It adds header includes, generates function prototypes so you can call functions before declaring them, and wraps everything into a proper main() function. Only after that does the real compiler run.
The compiler translates that C++ into machine code for the AVR architecture, and the linker combines it with the Arduino core libraries into a single executable image. The result is a .hex file containing the exact bytes the ATmega328P will run. This is standard embedded practice, and the same conceptual pipeline appears in every professional toolchain our Embedded Systems Pro Programme covers.
The Bootloader and the Serial Monitor
Getting that .hex file onto the chip normally requires a hardware programmer, but Arduino avoids this with a bootloader. This small program sits pre-installed in flash, runs briefly on every reset, and listens on the serial port for incoming firmware. If firmware arrives it writes it into flash, and if nothing arrives it hands control to your program.
The Serial Monitor is the other tool you will use constantly. Because a microcontroller has no screen, printing values back to your laptop over the USB serial link is your primary window into what the code is actually doing. We treat the Serial Monitor as a debugging instrument rather than an afterthought, since disciplined logging is exactly the habit that transfers into professional embedded development.
The Arduino Programming Language Is Really C++
The phrase “Arduino programming language” is convenient shorthand rather than a technical fact. Arduino sketches are compiled as C++ with a small set of helper libraries and a slightly relaxed file structure. Everything you know about C and C++ therefore applies directly, and everything you learn writing sketches transfers to professional embedded work.
This matters for your career, not just your understanding. A student who believes Arduino is a separate toy language tends to stop there, while a student who recognises it as C++ realises they are already writing production-relevant code. The gap between a good sketch and good firmware is smaller than most beginners assume.
setup(), loop(), and the Missing main()
Every sketch contains two functions, and they map onto a pattern used throughout embedded software. The setup() function runs exactly once after reset, and it is where you configure pin modes, start serial communication, and initialise any sensors. The loop() function then runs continuously, forever, for as long as the board has power.
Behind the scenes, the Arduino core supplies the main() function you never see. It calls setup(), then enters an infinite loop calling loop() repeatedly. This structure is the classic bare-metal super-loop, and recognising it as such is a genuinely useful moment in a student’s development.
The Core Functions and What They Hide
Functions such as pinMode(), digitalWrite(), and analogRead() are wrappers around direct register manipulation. When you call digitalWrite(13, HIGH), the library looks up which port and bit correspond to pin 13, then sets that bit in the port’s data register. It is convenient, readable, and noticeably slower than writing the register yourself.
That trade-off is the right one while you are learning, and the wrong one in time-critical production code. Our curriculum introduces direct port manipulation once students are comfortable, so they can see the same LED toggling many times faster with a single register write. Understanding both levels is what separates a hobbyist from an embedded engineer.
Ready to move from blinking an LED to building real embedded products? Our Bangalore trainers take you from your first Arduino sketch through sensor interfacing, communication protocols, and live capstone projects on industry hardware. Small batches, working boards on every desk, and mentors who have shipped commercial firmware. Enrol in our Arduino Programming Course →
Connecting Sensors: Where Hardware and Software Meet
Sensors are the point where your carefully written code meets the messy physical world. A sensor converts a physical quantity such as temperature, distance, light, or acceleration into an electrical signal your microcontroller can read. Choosing the right one and wiring it correctly is a skill that no amount of coding ability compensates for.
The first question with any sensor is always the interface, not the code. Does it output an analogue voltage, a simple digital high or low, or a stream of digital data over a protocol such as I2C or SPI? The answer determines which pins you use, which library you need, and how much you can trust the readings.
Analogue, Digital, and Protocol-Based Sensors
Analogue sensors are the simplest to reason about. An LM35 temperature sensor outputs a voltage proportional to temperature, and an LDR forms a voltage divider whose output tracks ambient light. You read them with analogRead() and convert the raw 0–1023 count back into meaningful units with a short calculation.
Protocol-based sensors are more capable and more demanding. An I2C accelerometer or a DHT22 humidity sensor communicates in packets, which means correct wiring, correct addressing, and a library that speaks the protocol properly. Our Embedded Systems Pro Programme devotes substantial lab time to I2C, SPI, and UART, because protocol competence is what employers in Manyata Tech Park actually screen for.
Signal Conditioning and the Habits That Save Projects
Raw sensor data is noisy, and treating it as truth is a beginner error we see constantly. Averaging several samples, discarding outliers, and applying a simple moving filter will improve almost every student project immediately. These are software fixes for hardware realities, and they are exactly the kind of judgement that distinguishes a working prototype from a demo that fails during evaluation.
Voltage levels deserve equal care. Many modern sensors run at 3.3 V and will be damaged by the Uno’s 5 V logic. A level shifter or a 3.3 V-tolerant board is therefore not optional, and checking the datasheet before wiring is a discipline our trainers insist upon.
Common Sensor Types You Will Interface at Microskill Lab
- Temperature: LM35 and DHT22, covering analogue and digital interfaces.
- Distance: HC-SR04 ultrasonic sensor, using timing rather than voltage.
- Light: LDR and photodiodes, read through the ADC.
- Motion: MPU6050 accelerometer and gyroscope over I2C.
- Gas and air quality: MQ-series sensors, requiring calibration and warm-up.
- Current and voltage: sensing modules for power-monitoring projects.
Arduino Versus Professional Embedded Development
Arduino is an excellent teacher and a limited production platform, and holding both ideas simultaneously is important for your career planning. The abstractions that make it approachable are precisely the abstractions that industry firmware strips away for performance, cost, and reliability reasons. Knowing where the boundary lies tells you when to move on.
The transition is far less dramatic than students fear. The C++ you write remains C++, the peripherals remain peripherals, and the debugging habits remain valuable. What changes is that you configure registers explicitly, read datasheets routinely, and use a professional IDE with a hardware debugger attached.
A Direct Comparison
| Aspect | Arduino Uno | Professional Embedded Development |
|---|---|---|
| Typical Use | Learning, prototyping, and college projects | Commercial products and industrial control |
| Language | C++ with Arduino core libraries | C, C++, and sometimes assembly |
| Hardware Access | Abstracted through helper functions | Direct register and peripheral configuration |
| Debugging | Serial print statements | Hardware debugger, breakpoints, and watch windows |
| Real-Time Control | Super-loop with limited timing guarantees | RTOS, interrupt-driven, and deterministic control |
| Power Optimisation | Minimal and rarely a concern | Critical and deeply engineered |
| Development Speed | Very fast | Slower but far more controllable |
| Hiring Relevance | Shows initiative and basic competence | Directly matches production job requirements |
Building Your Path Beyond the Uno
The natural progression from Arduino runs through a more capable microcontroller family and a professional toolchain. Many of our students move from the Uno to PIC or ARM Cortex-M devices, where they meet interrupt vectors, clock trees, and peripheral registers in their unabstracted form. Our PIC Microcontroller Programming Course exists precisely to make that step manageable rather than intimidating.
Others move sideways into connected devices, where the microcontroller becomes one node in a larger system. That path leads through networking, cloud integration, and edge processing, which our Internet of Things Programme covers with Bangalore’s device-manufacturing and product-engineering employers firmly in mind. Either route builds directly on what you learned making an LED blink.
Career Value: What Arduino Skills Are Actually Worth in India
Arduino on its own is not a job qualification, and any institute claiming otherwise is being dishonest with you. What it does provide is credible evidence that you can wire a circuit, write firmware, debug a system, and finish a project. Recruiters in Bangalore’s hardware and product-engineering companies read that evidence carefully, particularly in fresher interviews where academic marks look identical across candidates.
The students who convert Arduino experience into offers are the ones who go further. They combine it with a professional microcontroller, a communication protocol, and a project they can explain in technical depth. A candidate who can walk an interviewer through why they chose I2C over SPI, and what went wrong first, immediately outranks one who can only demonstrate a working demo.
Roles That Build on Embedded Foundations
- Embedded firmware engineer, writing production C for microcontrollers.
- Embedded hardware engineer, designing and validating circuit boards.
- IoT developer, connecting devices to gateways and cloud platforms.
- Robotics engineer, integrating sensors, actuators, and control logic.
- Test and validation engineer, building automated hardware test rigs.
- PCB design engineer, translating schematics into manufacturable boards.
Indicative fresher salaries for embedded roles in Bangalore commonly fall in the range of ₹3.5–6 LPA. Experienced firmware engineers earn considerably more, with the exact figure depending heavily on domain, company, and protocol depth. Salary figures are indicative and should be verified against current market data before publication.
Turning Student Projects into Interview Assets
A finished project is worth more than a certificate, and our curriculum is built around that conviction. We push every learner to complete a capstone that involves real sensors, real debugging, and a real failure that they diagnosed and fixed. That failure is often the most valuable part of the interview conversation.
Documentation is the piece students skip and interviewers notice. A clean schematic, commented code, and a written explanation of your design decisions turn a college project into a portfolio piece. Our team can discuss which learning path fits your background through our Contact Us page.
Frequently Asked Questions
Do I need to know C before learning Arduino?
No, but it helps considerably. Arduino sketches are C++ with helper libraries, so prior exposure to C or C++ shortens the learning curve. Complete beginners can start with Arduino and pick up the language fundamentals alongside the hardware, which is how many of our students begin.
Is the Arduino Uno still relevant in 2026?
Yes, as a learning and prototyping platform. The Uno remains the clearest teaching board available because everything on it is visible and comprehensible. It is not a production platform, and you should plan to move beyond it, but it remains an excellent place to start.
What is the difference between Arduino and a microcontroller?
A microcontroller is a chip, while Arduino is a board built around one plus the software environment that programs it. The Uno’s microcontroller is the ATmega328P, and everything else on the board exists to make that chip convenient to use. Once you can separate the two ideas, moving to other microcontroller families becomes far less intimidating.
Can I get an embedded systems job with only Arduino skills?
Not usually on its own. Arduino demonstrates initiative and basic competence, but employers expect familiarity with professional microcontrollers, communication protocols, and structured C. Treat Arduino as your foundation and build a professional skill set on top of it.
How long does it take to learn Arduino properly?
Basic proficiency takes a few weeks of consistent practice, while genuine confidence with sensors, protocols, and debugging takes a few months. The variable is project hours rather than tutorial hours, so students who build things learn considerably faster. We structure our batches around exactly that principle.
Should I learn Arduino or jump straight to STM32 or PIC?
Start with Arduino unless you already have strong C and electronics fundamentals behind you. The rapid feedback loop builds intuition efficiently, and that intuition transfers directly when you move to a professional platform. Skipping this stage tends to produce students who can copy register configurations without understanding them.