
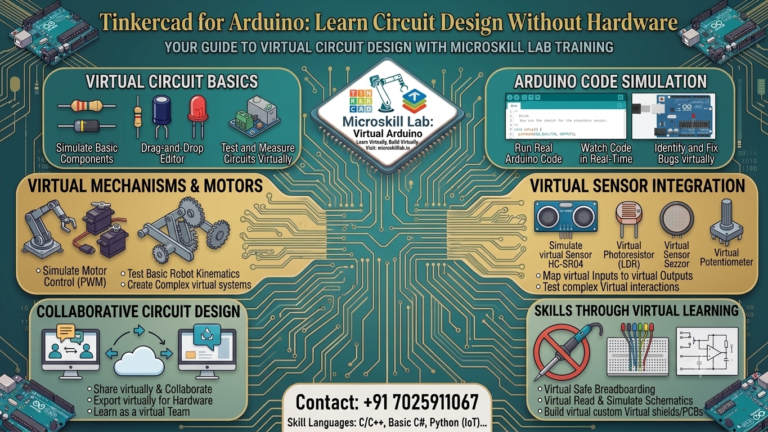
Tinkercad for Arduino lets you build, wire, and test complete circuits inside your browser, with zero hardware on your desk. You place an Arduino Uno on the canvas, drag in an LED, connect a resistor, and press Start Simulation, and the circuit runs as it would in the real world. If your wiring is wrong, nothing burns and nothing costs you money, which is precisely why we start beginners here. For learners across Bangalore, Kerala, Tamil Nadu, and Andhra Pradesh, this removes the biggest barrier to entering electronics, namely the cost and fear of destroying real components.
⚡ Key Takeaways
- You can learn Arduino circuit design and coding without buying a single component.
- Tinkercad simulates the Arduino Uno, sensors, motors, and displays in a real browser window.
- Wiring mistakes cost you nothing, so you experiment faster and learn far more deeply.
- The code you write in Tinkercad transfers directly to the Arduino IDE and real boards.
- Simulation has genuine limits, and we show you exactly where hardware becomes essential.
- Bangalore’s embedded hiring market rewards candidates who can demonstrate working projects.
What Tinkercad for Arduino Actually Is
Tinkercad Circuits is a free, browser-based electronics simulator built by Autodesk, and it runs entirely online with nothing to install. You open a browser tab, sign in, and you have a working electronics bench in front of you. There is no purchase and no setup beyond creating an account.
The Simulator Explained
Inside the workspace you get a components tray holding everything a beginner needs to start building, from an Arduino Uno board and breadboards to resistors, LEDs, sensors, servo motors, and LCD screens. You drag each component onto the canvas with your mouse, then wire them together by clicking from one pin to another. It works exactly as you would push a jumper wire into a physical breadboard.
Once your circuit is assembled, you press Start Simulation and the virtual Arduino boots up and begins running your sketch. The LEDs actually light up, a servo genuinely rotates through its arc, and a buzzer produces sound through your speakers. This is a real-time simulation of current, voltage, and code execution, not a pre-recorded animation.
Who Should Start With It
This tool suits absolute beginners better than any other resource we know of, and if you have never held a breadboard, you are the ideal user. It assumes nothing, punishes nothing, and lets you make every mistake in the book without consequence. That combination is rare in technical education, and it is worth taking advantage of.
Beyond complete beginners, it fits three other groups particularly well:
- ECE, EEE, and CSE students in Karnataka and Kerala colleges where lab access is limited or heavily scheduled.
- Career changers moving from IT or non-core roles who want to explore embedded systems before committing money.
- Working professionals in Bangalore who want to prototype ideas at night without setting up a workbench.
Our beginners in the Arduino Programming Course spend their first sessions entirely inside this environment before touching a physical board. A learner who has already built twenty circuits on screen approaches real hardware with confidence rather than anxiety. That confidence separates a learner who keeps going from one who quietly gives up after their first burnt LED.
Why Beginners Should Simulate Before Buying Hardware
An Arduino Uno starter kit in India typically costs between ₹1,500 and ₹3,500, depending on how many sensors are bundled with it. For a student who is not yet sure whether embedded systems is the right path, that is significant money. Simulation lets you answer that question before you spend anything at all.
Cost, Risk, and Confidence
The financial risk sits not in the kit price alone but in the replacement cost of everything you will inevitably break. Reverse the polarity on an LED and it dies immediately, and connect a DC motor directly to a digital pin without a driver and you can damage the microcontroller itself. Beginners do both regularly, because nobody explained why they mattered until after the component had already failed.
Tinkercad removes this entire category of risk, because you can short a circuit deliberately just to observe what the simulator reports back. Nothing is destroyed, nothing needs reordering, and no delivery delay stalls your learning for a week. Our beginner learners typically build twelve to fifteen distinct circuits in simulation before their first hardware session even begins.
The Learning Speed Advantage
Debugging real hardware is slow precisely because the number of possible failure points is so large for someone new. Is the problem in your code, in your wiring, in a loose jumper, or in a component that arrived dead from the seller? A beginner has no reliable way to tell these apart, and so they guess.
In simulation, the hardware is always perfect and always behaves according to the datasheet, so any failure must lie in your logic or your wiring diagram. This is why our Electronics Fundamentals Programme pairs simulation directly with circuit theory rather than treating them as separate subjects. Learners watch Ohm’s law behave correctly on screen, with numbers matching their hand calculations, before they ever pick up a multimeter.
Setting Up Your First Tinkercad Arduino Circuit
Getting started takes under ten minutes from a cold start, and you need only a browser and an email address. There is no software to install, no libraries to configure, and no driver issues to troubleshoot. This matters more than it sounds, because many beginners abandon Arduino during toolchain setup alone.
From Account to Canvas
Begin by creating a free Autodesk account on the Tinkercad site, which requires nothing beyond an email address. Once signed in, choose the Circuits section rather than the 3D Design section, because Tinkercad hosts both and beginners frequently land in the wrong one. From there, click Create New Circuit and an empty workspace opens in front of you.
Search the components panel for “Arduino Uno R3” and drag the board to the centre of the canvas, then place a small breadboard alongside it. Leave enough space between them that your wires will stay readable once the circuit grows. This two-component layout is the foundation from which every beginner circuit we teach begins.
Wiring Your First LED
Place an LED onto the breadboard so its legs sit in separate rows, then add a 220-ohm resistor in series with the longer anode leg. The resistor is not optional, even though the simulation will run happily without one, because the habit you build here is the habit you carry to real hardware. Run a wire from the resistor to Arduino digital pin 9, and a second wire from the LED cathode to any GND pin.
Click each wire after placing it and assign a colour, using red for power, black for ground, and something distinct for signal. Colour discipline feels cosmetic to beginners, but it is the difference between a circuit you can debug and one you cannot. Now open the Code panel, where Tinkercad offers both block coding and text coding side by side.
Writing Arduino Code Inside the Simulator
The code editor inside Tinkercad is effectively a simplified Arduino IDE, and the syntax it accepts is identical to the real thing. Your setup() and loop() functions work the same way, the standard library functions behave the same way, and the compiler complains about the same mistakes. Nothing you learn here has to be unlearned later.
Blocks Versus Text
Block mode works by dragging visual puzzle pieces together, snapping them into sequences that represent your program’s flow. It makes syntax errors structurally impossible, which genuinely helps on your first day when everything is unfamiliar at once. Text mode, by contrast, gives you the real C++ that runs on production hardware in actual shipped products.
Every embedded role advertised in Bangalore expects candidates to read and write text-based code fluently, and no employer accepts a block diagram in a technical interview. Our advice is therefore direct: use blocks for two sessions at most, then switch to text permanently. Tinkercad eases this by showing the text equivalent of your blocks alongside them, so you watch the C++ assemble itself as you drag.
The Serial Monitor and Debugging
Tinkercad includes a fully working Serial Monitor, and your Serial.println() statements print to it exactly as they would on a real board. Print your raw sensor values, print the state of your variables, and print a marker line inside each function. Watching those numbers scroll past as the simulation runs turns an invisible program into something you can reason about.
Learners in our Embedded Systems Pro Programme carry this habit directly into professional work, where the boards are far more complex but the technique is unchanged. Serial debugging never stops being useful, however sophisticated the systems you eventually work on become. The engineers quickest at diagnosing faults are almost always the ones who instrument their code heavily.
Ready to move from simulation to real circuits? Our beginner Arduino batches take you from your first virtual LED to a working hardware project you can demonstrate in an interview. Our trainers sit with you through every wiring error and every stubborn bug, both on screen and on the bench. Explore the Arduino Programming Course →
Sensors and Components You Can Simulate
The Tinkercad component library is broad enough to support genuinely useful beginner and early-intermediate projects, not just toy demonstrations. You will not find every module on the market, but you will find enough to build things that solve real problems. That is the right level of ambition for someone in their first three months.
What Tinkercad Supports Well
The library covers essentially all of the components that a first-year project is likely to need:
- Sensors: ultrasonic distance sensor, temperature sensor (TMP36), photoresistor, PIR motion sensor, and gas sensor.
- Outputs: standard LEDs, RGB LEDs, piezo buzzers, LCD 16×2 displays, and seven-segment displays.
- Motion: servo motors, DC motors, and stepper motors with their driver boards.
- Inputs: pushbuttons, slide switches, potentiometers, and matrix keypads.
- Passives: resistors, capacitors, diodes, transistors, and relays.
With this set you can build a distance-sensing reverse alarm, a temperature-triggered cooling fan, or a servo-controlled gate that opens on a button press. These are not trivial exercises, and they combine timing, analogue reading, conditional logic, and actuator control. They are also exactly the kind of projects that fill out a fresher portfolio credibly.
The Sensor Projects We Recommend First
Start with an ultrasonic parking sensor, which measures distance and lights a different LED as an object comes closer. It teaches timing, arithmetic, and conditional logic within a single circuit, and it produces a visibly satisfying result.
Move next to a temperature-controlled LED indicator built around the TMP36, which introduces analogue reading and the ten-bit ADC properly.
Finish with a servo driven by a potentiometer, where turning the knob moves the servo arm proportionally. That single circuit is the conceptual seed of every robotic arm and camera gimbal ever built, and it is deceptively simple to construct. It also maps directly into our Internet of Things Programme once you replace the physical knob with a command arriving over a network.
Where Simulation Ends and Real Hardware Begins
We are consistently honest with our learners on this point, because overselling simulation would do them real harm. Tinkercad is a starting point and a teaching tool, but it is not a destination and not a substitute for hardware experience. Anyone who tells you otherwise is selling you something.
The Limits You Will Hit
Simulation is idealised by design, presenting components that always work and connections that never fail. Real electronics is nothing like this, and the gap between the two is where most self-taught learners lose weeks of progress. The differences below are worth studying before you assume that simulated competence equals real competence.
Tinkercad Simulation vs Real Arduino Hardware
| Aspect | Tinkercad Simulation | Real Arduino Hardware |
|---|---|---|
| Component failure | Never happens | Common, especially with cheap parts |
| Wiring faults | Connections are always perfect | Loose jumpers, cold joints, and broken wires |
| Power supply | Always clean and stable | Voltage drops, brownouts, and noisy supply |
| Timing accuracy | Approximate | Exact and sometimes unforgiving |
| Component library | Limited set only | Any available sensor or module |
| Cost to start | Free | ₹1,500–₹3,500 for a starter kit |
| Interview value | Shows conceptual understanding | Shows demonstrable working proof |
| Speed of iteration | Very fast | Slower, physical, and tactile |
Making the Transition Confidently
The readiness signal we use is straightforward and easy to self-assess: you are ready for hardware once you can wire a familiar circuit in simulation without consulting a diagram. The transition itself is easier than most beginners fear, because your code is identical, your pin numbers are identical, and the logic you have already debugged still holds. The only genuinely new element is physical handling, which means seating components firmly and learning that a wire can look connected without actually being connected.
Our trainers run this bridge session in person at our Bangalore centre, walking each learner through their first physical build with the simulated version open alongside it. Learners across Karnataka, Kerala, and Tamil Nadu attend our blended batches specifically for this hands-on component, because it cannot be replicated on a screen. Simulation builds the mind, hardware builds the hands, and a working engineer needs both.
Common Beginner Mistakes We See in Tinkercad
Simulation is forgiving, but it still surfaces habits that cause real damage once you work with physical components. The mistakes below are the ones we correct most often across our beginner cohorts. Fixing them while the stakes are zero is far cheaper than fixing them later.
Wiring Errors That Repeat
By far the most frequent mistake is a missing or incorrect ground connection somewhere in the circuit. Everything looks complete, the code compiles cleanly, the simulation starts, and nothing happens at all. Always trace your ground path first when a circuit refuses to respond.
The second error is the forgotten current-limiting resistor, since Tinkercad will drive an LED directly from a digital pin and let it glow happily with no warning. On real hardware that same circuit slowly degrades the pin and eventually kills it.
The third is pin confusion, where a learner writes to pin 9 but has wired the component to pin 8, and neither the compiler nor the Serial Monitor will warn you.
Code Habits Worth Fixing Early
Avoid leaning on delay() as your only timing mechanism, however tempting it is at the beginning. It blocks the entire program while it waits, meaning your Arduino cannot read a sensor or respond to a button during that period. Learn millis() for non-blocking timing while still in simulation, because every serious Arduino project eventually depends on it.
Name your variables properly from the very first sketch, because int sensorPin = A0; tells a reader exactly what that value represents while int x = A0; tells them nothing.
Comment your circuits at the top of every sketch, listing which pin connects to which component and why. Learners who move on to our PIC Microcontroller Programming Course find these habits transfer intact to a completely different architecture.
Turning Tinkercad Practice Into a Career Start
A simulator on its own will never get you hired, and it would be dishonest to suggest otherwise. What can get you hired is the portfolio of work you build using it as a foundation. That distinction will shape how you spend your next three months.
The Bangalore Embedded Job Market
Bangalore remains India’s densest hiring cluster for embedded systems work by a considerable margin. Electronic City, Whitefield, and Manyata Tech Park together host automotive electronics teams, industrial automation firms, and IoT product companies, and all of them hire at entry level. Proximity to that concentration of employers is a genuine advantage for learners in or near the city.
Entry-level embedded and IoT roles in Bangalore are commonly advertised in the region of ₹3.5–6 LPA, with experienced engineers earning considerably more. Treat these as indicative bands rather than guarantees, since they vary sharply by company, domain, and what you can actually demonstrate. The differentiator at interview is rarely the certificate but whether you can explain a circuit you personally built and how you debugged it.
Building a Portfolio That Gets Read
Simulate five projects properly, then build three of them physically once you have a starter kit in hand. Photograph each finished build clearly and record a short video showing it working, because a recruiter will watch thirty seconds of video sooner than read a page of text.
Push all of your code to a public repository with a clear README explaining what the circuit does and what failed on your first attempt.
That last section is the one that impresses experienced engineers, because it shows you debugged something rather than copying a working tutorial. A well-written project summary explaining your reasoning does more for your candidacy than a certificate PDF ever will.
If you want structured guidance on building this kind of portfolio, talk to our team about the right starting course.
Frequently Asked Questions
Is Tinkercad free for Arduino simulation?
Yes, Tinkercad Circuits is completely free once you create an Autodesk account. There is no paid tier required for any of the simulation features described here, and no trial period that expires. You can use it indefinitely at no cost.
Can I use Tinkercad code on a real Arduino Uno?
Yes, and this is one of the strongest reasons to learn in it. Copy your text-mode code out of Tinkercad, paste it into the Arduino IDE, select your board and port, and upload. The syntax is standard Arduino C++, so nothing needs translating or rewriting.
Does Tinkercad work offline?
No, it is entirely browser-based and requires an active internet connection to function. The simulation itself runs client-side in your browser, so a modest connection is sufficient. It simply cannot load without one.
Is Tinkercad alone enough to get an embedded systems job?
No, and we would never claim otherwise to a prospective learner. It is an excellent foundation for understanding circuits and code, but employers want evidence of hardware experience, practical debugging ability, and delivered projects. Use simulation to learn, then use hardware to prove it.
Which components are missing from Tinkercad?
A number of popular modules are absent from the library, including most Wi-Fi and Bluetooth modules, ESP32 and ESP8266 boards, and specialised industrial sensors. Anything involving network connectivity generally falls outside what the simulator supports. For those, real hardware is the only option.
Should I learn Tinkercad before joining a course?
It certainly helps, but it is not a prerequisite for any of our beginner batches. We assume zero prior exposure and teach the simulator from the very first session, so nobody arrives at a disadvantage. If you want a head start, wiring a few LED circuits beforehand is a reasonable place to begin.