
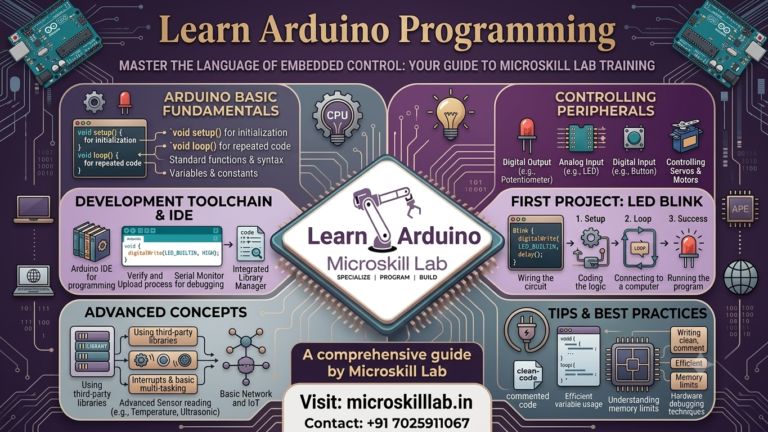
Learn Arduino Programming: 30-Day Roadmap for Beginners
If you want to learn Arduino programming as a complete beginner, the fastest path is a structured 30-day plan that moves from Arduino IDE setup to real hardware projects, not scattered YouTube tutorials. This roadmap is built for engineering students and hobbyists in Bangalore who want a working knowledge of Arduino Uno, the Arduino programming language, and embedded systems basics within one month. By the end of Day 30, you will have built at least five working circuits and written your own sensor-based code from scratch.
⚡ Key Takeaways
- Get a day-by-day, four-week schedule that takes you from zero coding experience to independent Arduino projects.
- Understand exactly which Arduino Uno components, sensors, and modules you need to buy in Bangalore before you start.
- Learn how the Arduino programming language (C/C++ based) differs from general-purpose coding languages.
- See which beginner and intermediate projects build the strongest embedded systems portfolio for internships.
- Know how much Bangalore’s embedded systems and IoT hiring market pays freshers with Arduino skills in 2026.
- Find out how a structured classroom course compares to self-learning, and when each approach makes sense.
What Is Arduino Programming? A Beginner’s Introduction
Arduino programming is the process of writing code, uploading it to an Arduino microcontroller board, and using that code to control real-world hardware such as LEDs, motors, and sensors. It sits at the intersection of electronics and coding, which makes it one of the most approachable ways for students to enter embedded systems. Unlike pure software coding, Arduino programming gives you a tangible, physical result you can see and touch.
Students choose Arduino because the learning curve is gentle compared to other microcontroller platforms. The Arduino Uno board, the free Arduino IDE, and a simplified version of C/C++ together remove most of the setup friction that discourages beginners in electronics.
Understanding Arduino Uno and How It Works
The Arduino Uno is a credit-card-sized microcontroller board built around the ATmega328P chip, with 14 digital input/output pins and 6 analog input pins. It reads sensor data, processes it according to your code, and sends output signals to components like motors, buzzers, and displays.
- The board connects to your laptop via USB for both programming and power.
- It runs one program (called a sketch) at a time, in a continuous loop.
- It supports both digital signals (on/off) and analog signals (variable values).
Students in our Arduino Programming and Projects Course start every session with hands-on Arduino Uno wiring before touching a single line of code because understanding the hardware first makes the programming logic click much faster.
Who Should Learn Arduino Programming?
Arduino programming suits a wide range of learners, not just electronics engineering students. Computer science students use it to understand hardware-software interaction, mechanical engineering students use it for robotics projects, and hobbyists use it to automate home projects.
You do not need prior coding experience to start, though basic familiarity with variables and loops helps you move faster through the first week. Most students who join Microskill Lab’s Arduino batches in Bangalore are first- or second-year engineering students preparing for academic mini-projects or internship applications.
Why Learn Arduino Programming in 2026? (Career Value in Bangalore)
Bangalore’s electronics and embedded systems hiring market has grown steadily, driven by IT-ITES companies expanding into IoT, automotive electronics, and industrial automation. Arduino is rarely the final tool used in production environments, but it remains the standard entry point that recruiters expect freshers to have already mastered before moving to industrial-grade microcontrollers like PIC or ARM-based boards.
Companies with a strong presence in Bangalore’s electronics corridor, including Bosch, Siemens, and L&T, regularly hire embedded systems freshers who can demonstrate practical microcontroller project experience, and an Arduino portfolio is one of the easiest ways to prove that experience during placement interviews.
Embedded Systems Careers in Bangalore’s Tech Corridor
Bangalore’s Electronic City and Whitefield tech clusters host a dense concentration of embedded systems and hardware design roles, from automotive sensor firmware to industrial IoT devices.
Entry-level embedded systems engineers with demonstrable Arduino or microcontroller project experience typically earn between ₹3.5 LPA and ₹6 LPA as freshers in Bangalore, with experienced embedded engineers earning significantly more as they move into firmware and PCB design specializations. These salary figures should be verified against current market data before publication.
Recruiters consistently tell us that candidates who can explain a self-built Arduino project in an interview stand out far more than candidates who only list theoretical coursework on their resume.
Arduino as a Gateway to IoT and Robotics
Once you are comfortable with Arduino programming, the same logic transfers directly to IoT device development, robotics, and home automation projects, all of which are active hiring areas in Bangalore’s electronics and manufacturing sector.
- Arduino skills transfer to robotics competitions and college technical fests.
- The same programming logic applies to ESP32 and IoT development boards.
- Sensor interfacing knowledge is directly reusable in industrial automation roles.
Setting Up Your Arduino Learning Environment
Before you write a single sketch, you need the Arduino IDE installed and a starter hardware kit ready. Rushing this step is the single biggest reason beginners get stuck and give up in the first week.
Installing the Arduino IDE
The Arduino IDE is free, open-source software available for Windows, macOS, and Linux, and it is where you will write, verify, and upload all your code to the Arduino Uno board.
Download it directly from the official Arduino website rather than third-party mirrors, since outdated versions often cause driver and upload errors on Windows machines.
- Download the correct installer for your operating system from the official Arduino website.
- Install the USB driver prompted during setup (critical for Windows users).
- Select the correct board (Arduino Uno) and COM port under the Tools menu before uploading code.
If you get stuck at the driver installation stage, our Arduino Programming and Projects Course covers Arduino IDE installation and troubleshooting with step-by-step guidance.
Choosing Your First Arduino Uno Kit
A basic starter kit is enough for the first two weeks of this roadmap. You do not need an expensive kit to start.
Your kit should include:
- Arduino Uno board.
- Breadboard.
- Jumper wires.
- LEDs and resistors.
- Push button.
- At least one sensor, such as an ultrasonic distance sensor.
Students enrolled in our Arduino Programming and Projects Course receive a curated component kit as part of the programme.
The 30-Day Arduino Programming Roadmap
This roadmap is divided into four weekly blocks, moving from core programming concepts to independent project building.
Each week assumes approximately 45–60 minutes of daily practice, making it realistic alongside college studies.
Week 1–2: Fundamentals of Arduino Programming
The Arduino programming language is based on simplified C/C++, structured around two functions:
setup()— executes once when the board starts.loop()— runs continuously.
Week 1 focuses on blinking LEDs, reading push buttons, and understanding variables.
Week 2 introduces:
- Analog input.
- PWM (Pulse Width Modulation).
- Serial Monitor.
- Conditional statements.
Daily milestones:
- Days 1–3: IDE setup, Blink sketch,
pinMode(), anddigitalWrite(). - Days 4–7: Push-button input,
ifstatements, and debouncing basics. - Days 8–10: Analog input using potentiometers and the Serial Monitor.
- Days 11–14: PWM output for LED brightness and simple motor control.
Week 3–4: Building Real Arduino Projects
Weeks 3 and 4 combine multiple sensors and outputs into complete mini-projects.
- Days 15–18: Ultrasonic distance measurement with buzzer alerts.
- Days 19–22: Temperature and humidity monitoring using a DHT sensor and LCD display.
- Days 23–26: Servo motor control with sensor-triggered automation.
- Days 27–30: A capstone project documented with source code and a project report.
By Day 30, you should comfortably read datasheets, write modular Arduino code, and troubleshoot upload or wiring issues independently.
This is the baseline expected before students progress into our Embedded Systems Pro Programme.
Essential Arduino Projects for Beginners
Simple Projects
- Traffic light simulator using LEDs.
- Push-button-controlled LED.
- Automatic night lamp using an LDR sensor.
Intermediate Projects
- Ultrasonic parking-assist system.
- DHT11 temperature and humidity monitor with LCD.
- Servo-based automatic gate or door opener.
These projects, along with many additional guided exercises, are included in our Arduino Programming and Projects Course.
Ready to build real Arduino projects instead of only following online tutorials? Our Bangalore trainers guide you through every stage—from your first Blink sketch to a complete capstone project using real hardware. Enrol in the Arduino Programming and Projects Course →
Course Curriculum at Microskill Lab Training Institute
While this roadmap works well for motivated learners, a structured classroom environment removes much of the trial-and-error associated with hardware debugging and library configuration.
What You’ll Learn
- Arduino IDE installation and configuration.
- Arduino Uno architecture and pin configuration.
- Embedded C/C++ programming fundamentals.
- Sensor and actuator interfacing.
- Communication protocols.
- Capstone embedded systems project.
After completing Arduino, many students continue into:
- Embedded Systems Pro Programme
- PIC Microcontroller Programming
- Internet of Things (IoT)
- Embedded Linux Development
Batch Options
| Batch Type | Duration | Class Format | Best For |
|---|---|---|---|
| Weekday Evening | 4 Weeks | Offline (Bangalore) | College students |
| Weekend Batch | 5 Weeks | Offline (Bangalore) | Students with weekday classes |
| Blended Batch | 6 Weeks | Live Online + Lab Visits | Students outside Bangalore |
For current batch schedules, please visit our Contact Us page.
Choosing the Right Arduino Training Institute
Questions to Ask Before Enrolling
- Are practical hardware sessions included?
- Is the Arduino component kit included in the course fee?
- Does the course include instructor-reviewed projects?
- Is placement guidance available?
- What is the student-to-trainer ratio?
Common Red Flags
- Slides-only training with little or no hands-on practice.
- Large classroom sizes that limit one-to-one guidance.
- Hidden charges for hardware kits.
- No final project or portfolio support.
Self-Learning vs Structured Arduino Course
| Factor | Self-Learning | Structured Course at Microskill Lab |
|---|---|---|
| Debugging support | Self-guided | Instructor support |
| Hardware kit | Purchase separately | Provided |
| Project documentation | Self-managed | Trainer-reviewed capstone project |
| Placement support | None | Interview and placement guidance |
| Typical learning time | 2–4 months | 4–6 weeks |
If you are ready to begin your embedded systems journey, contact our admissions team to learn about upcoming batches.
Frequently Asked Questions
Is Arduino programming difficult for beginners?
No. Arduino uses simplified C/C++, making it one of the easiest platforms for learning embedded programming.
Do I need an expensive laptop?
No. Arduino IDE runs comfortably on Windows, macOS, and Linux using most entry-level laptops.
What comes after learning Arduino?
Most learners progress into PIC microcontrollers, ARM-based embedded systems, IoT, PCB design, or Embedded Linux depending on their career goals.
Will Arduino projects help during placement interviews?
Yes. Employers consistently value candidates who can explain practical Arduino or embedded systems projects because they demonstrate genuine problem-solving skills.
Can non-electronics students learn Arduino?
Absolutely. Computer science students, mechanical engineering students, and hobbyists regularly use Arduino to understand hardware-software interaction and build practical automation projects.