
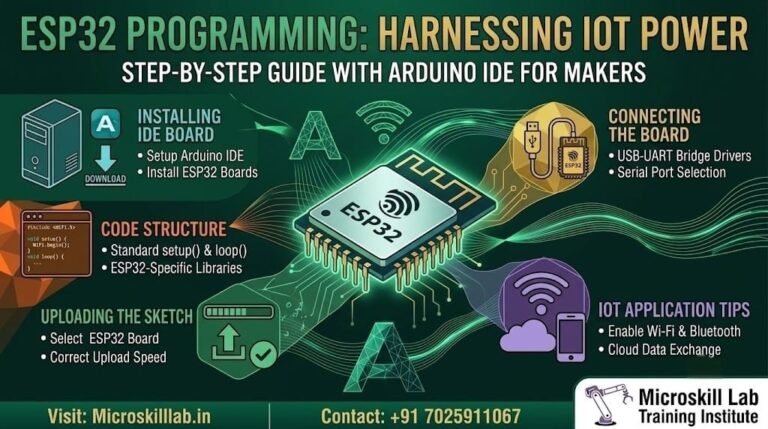
ESP32 programming with Arduino IDE lets you build Wi-Fi and Bluetooth IoT projects using the same simple C++ code you already know from Arduino Uno. For IoT developers across Bangalore, Kerala, Tamil Nadu, and the rest of South India, this pairing is the fastest route into connected-device development. You write code in the familiar Arduino IDE, add the ESP32 board package, connect a USB cable, and upload. The ESP32 then handles Wi-Fi, Bluetooth, sensors, and cloud communication on a single low-cost chip. This guide walks our learners through setup, core concepts, and a first working sketch, then shows where structured training accelerates the journey.
⚡ Key Takeaways
- You can program the ESP32 entirely inside the Arduino IDE using standard Arduino C++, so your existing skills transfer directly.
- The ESP32 adds built-in Wi-Fi and Bluetooth, making it far more capable than the Arduino Uno for IoT projects.
- A correct board-manager URL and driver setup are the two steps where most beginners get stuck.
- One board handles sensors, wireless connectivity, and cloud dashboards, reducing hardware cost for IoT prototypes.
- Structured, project-led training helps you move from blinking an LED to deploying live IoT solutions faster.
- Bangalore’s IoT and embedded-systems job market rewards developers who can demonstrate hands-on ESP32 project experience.
What Is ESP32 Programming with Arduino IDE?
ESP32 programming with Arduino IDE means writing firmware for the ESP32 microcontroller using the Arduino development environment instead of Espressif’s more complex native toolchain. The ESP32 is a powerful dual-core chip with integrated Wi-Fi and Bluetooth, and the Arduino IDE gives beginners a gentle on-ramp. You get the same editor, the same setup() and loop() structure, and the same large library ecosystem. This combination is why so many IoT developers start here rather than with bare-metal tools.
Who This Approach Is For
This approach suits engineering students, ECE and CSE freshers, hobbyists, and working developers who want to build connected products quickly. If you have used an Arduino Uno before, you already understand most of what you need.
Our trainers regularly see learners from non-embedded backgrounds succeed because the Arduino IDE hides much of the low-level complexity. It is an ideal foundation before advancing to deeper embedded work through our Embedded Systems Pro Programme.
ESP32 vs Arduino Uno at a Glance
The ESP32 and Arduino Uno share a programming style but differ sharply in capability. The Uno is an 8-bit board with no wireless features, which makes it ideal for learning core concepts such as pins, timing, and simple sensors.
The ESP32 is a 32-bit dual-core board with Wi-Fi, Bluetooth, far more memory, and many more GPIO pins for richer projects. For any project that needs internet connectivity, the ESP32 is the practical choice, and our curriculum treats it as the natural next step after Arduino Uno fundamentals are secure.
| Feature | Arduino Uno | ESP32 |
|---|---|---|
| Processor | 8-bit ATmega328P | 32-bit dual-core processor |
| Clock Speed | 16 MHz | Up to 240 MHz |
| SRAM | 2 KB | Approximately 520 KB |
| Flash Memory | 32 KB | Typically 4 MB |
| Wi-Fi | Not built-in | Built-in |
| Bluetooth | Not built-in | Bluetooth Classic and BLE |
| Operating Voltage | 5 V | 3.3 V |
| Best Suited For | Electronics fundamentals and basic automation | IoT, wireless communication, and advanced sensor projects |
Why ESP32 Skills Matter for Your Career in Bangalore in 2026
IoT hiring across Bangalore’s technology corridors continues to grow, and the ESP32 sits at the centre of many product prototypes. Employers in Electronic City, Whitefield, and Manyata Tech Park value developers who can take a sensor idea to a working wireless prototype.
The ESP32 appears regularly in this work because it is affordable, capable, and well documented. Demonstrating real ESP32 projects gives freshers a clear advantage during interviews.
IoT Salary Benchmarks in India
Embedded and IoT engineers in Bangalore earn competitive salaries that rise with hands-on skill. Indicative ranges suggest entry-level IoT developers may earn approximately ₹4–7 LPA, while experienced embedded engineers may reach ₹12–18 LPA or more.
These figures vary by company, role, and skill depth, so they should be treated as directional rather than fixed and verified against current job listings before publication.
What consistently helps candidates is a portfolio of working projects, which our Internet of Things Programme is designed to produce.
Industries Hiring ESP32 Developers
ESP32 skills create opportunities across several sectors in Karnataka and neighbouring states.
- Smart-home product development.
- Industrial monitoring and automation.
- Automotive prototyping.
- Agritech and environmental monitoring.
- Energy-management systems.
- Consumer electronics.
- Security and access-control products.
- Wireless sensor networks.
Product startups use ESP32 for connected devices, while larger companies use it for rapid prototyping and proof-of-concept development. Automotive, agritech, and energy-monitoring companies across South India increasingly deploy connected sensors built on this platform.
Because the chip is affordable and versatile, demand spans both established firms and Karnataka’s growing MSME hardware ecosystem. Learners who can demonstrate a working wireless prototype tend to stand out during hiring conversations.
Setting Up the Arduino IDE for ESP32
Getting the Arduino IDE ready for ESP32 takes only a few steps, but each one matters. First, install the Arduino IDE. Next, add the ESP32 board package through the Boards Manager. Then select the correct ESP32 board and communication port before uploading code.
Installing the Arduino IDE
Download the current Arduino IDE from the official Arduino website and install the version compatible with your operating system.
The Arduino IDE is available for:
- Windows.
- macOS.
- Linux.
Beginners can first learn the IDE workflow through our Arduino Programming and Projects Course before progressing to ESP32-specific wireless development.
Adding the ESP32 Board Manager URL
Open the Arduino IDE preferences and locate the Additional Boards Manager URLs field. Add the official Espressif ESP32 board-package URL supplied in the ESP32 Arduino documentation.
After adding the URL:
- Open Tools → Board → Boards Manager.
- Search for ESP32.
- Select the ESP32 board package published by Espressif Systems.
- Install the package.
- Wait for the compiler toolchain and board definitions to finish downloading.
This package provides the compiler, libraries, board definitions, and upload tools required to build ESP32 firmware through the Arduino IDE.
A mistyped or outdated board-manager URL is one of the most common setup failures encountered by beginners.
Drivers and Port Selection
Many ESP32 development boards use a USB-to-serial converter that may require a separate driver on Windows.
Common USB interface chips include:
- CP2102.
- CP210x.
- CH340.
- CH341.
- FTDI variants.
If your ESP32 does not appear as a COM port:
- Check which USB-to-serial chip is fitted to the board.
- Install the correct driver.
- Reconnect the ESP32.
- Restart the Arduino IDE.
- Select the new port under Tools → Port.
Also select the exact ESP32 board variant under the Board menu. Selecting the wrong board profile can cause upload failures, incorrect flash settings, or unexpected pin behaviour.
Writing Your First ESP32 Sketch
Your first ESP32 sketch follows the familiar Arduino structure of setup() and loop(). The setup() function runs once to initialise pins, communication interfaces, and wireless connections. The loop() function then runs repeatedly.
Your First LED Blink Project
A good first project is blinking the onboard LED.
const int LED_PIN = 2;

void setup() {
  pinMode(LED_PIN, OUTPUT);
}

void loop() {
  digitalWrite(LED_PIN, HIGH);
  delay(1000);

  digitalWrite(LED_PIN, LOW);
  delay(1000);
}
Onboard LED pin numbers vary between ESP32 board models. Check the board documentation if pin 2 does not control the LED on your development board.
Understanding the Arduino Programming Language
The Arduino programming language is essentially C++ with helpful functions and libraries. You use familiar functions such as:
pinMode()digitalWrite()digitalRead()analogRead()delay()millis()Serial.begin()Serial.println()
On ESP32, additional libraries provide access to:
- Wi-Fi.
- Bluetooth.
- Hardware timers.
- Deep-sleep functions.
- Web servers.
- MQTT communication.
- Over-the-air firmware updates.
Because the language remains consistent, learners can reuse their Arduino Uno knowledge and focus on ESP32’s wireless and processing capabilities.
Connecting the ESP32 to Wi-Fi
Connecting the ESP32 to Wi-Fi requires only a few lines of code using the built-in WiFi.h library.
#include <WiFi.h>

const char* WIFI_NAME = "Your_WiFi_Name";
const char* WIFI_PASSWORD = "Your_WiFi_Password";

void setup() {
  Serial.begin(115200);

  WiFi.begin(WIFI_NAME, WIFI_PASSWORD);

  Serial.print("Connecting to Wi-Fi");

  while (WiFi.status() != WL_CONNECTED) {
    delay(500);
    Serial.print(".");
  }

  Serial.println();
  Serial.println("Wi-Fi connected");
  Serial.print("IP address: ");
  Serial.println(WiFi.localIP());
}

void loop() {
}
This sketch:
- Starts serial communication.
- Begins connecting to the Wi-Fi network.
- Waits until the connection succeeds.
- Prints the ESP32’s local IP address.
Do not publish real Wi-Fi credentials in public code repositories. Replace them with placeholders or use a separate configuration file excluded from version control.
Connecting Sensors and Cloud Dashboards
Once connected to Wi-Fi, the ESP32 can read sensor values and send them to:
- A cloud dashboard.
- A local web server.
- An MQTT broker.
- A mobile application.
- A database.
- A home-automation platform.
This is where a simple temperature sensor becomes a live IoT monitoring system that can be viewed remotely.
Building these complete links, from physical sensor to online dashboard, is a core focus of our hands-on projects and applied sessions in the Internet of Things Programme.
Ready to progress from your first sketch to real IoT products? Our project-led training gives you structured practice guided by trainers with practical industry experience. You will build working wireless projects that can be demonstrated to employers across Bangalore and South India. Explore our IoT Programme →
Core ESP32 Features Every IoT Developer Should Know
The ESP32 combines a strong feature set with a low-cost module, which is why it is widely used for IoT prototypes and connected-device learning.
Beyond Wi-Fi and Bluetooth, it offers dual processing cores, power-saving modes, and a wide range of hardware peripherals.
Wi-Fi and Bluetooth Connectivity
Wi-Fi and Bluetooth are the main features that separate ESP32 from classic Arduino boards.
The ESP32 can operate as:
- A Wi-Fi client connected to an existing router.
- A Wi-Fi access point that creates its own network.
- A Wi-Fi client and access point simultaneously.
- A Bluetooth Classic device.
- A Bluetooth Low Energy device.
This flexibility supports projects such as:
- Smart sensors.
- Phone-controlled devices.
- Wireless switches.
- BLE beacons.
- Local web-server controls.
- Remote monitoring systems.
GPIO, Sensors, and Hardware Peripherals
The ESP32 supports a wide range of interfaces and peripherals.
- Digital GPIO.
- Analog-to-digital conversion.
- Digital-to-analog output on supported pins.
- PWM output.
- I2C communication.
- SPI communication.
- UART communication.
- Capacitive-touch sensing.
- Hardware timers.
- Interrupts.
These capabilities allow the ESP32 to interface with temperature, motion, light, pressure, distance, and environmental sensors, along with displays, relays, motors, and other actuators.
A strong understanding of circuits and component interfacing can be developed through our Electronics Fundamentals Programme.
Dual-Core Processing
Many ESP32 variants include two processor cores. This allows the system to manage wireless communication and application logic more effectively than a simple single-core microcontroller.
Advanced projects can distribute tasks between cores, although complete beginners should first become comfortable with basic Arduino programming and timing before exploring multicore code.
Deep-Sleep Mode
ESP32 deep-sleep mode significantly reduces power consumption for battery-operated devices.
It is useful for projects that:
- Wake periodically.
- Read a sensor.
- Transmit data.
- Return to sleep.
This pattern is commonly used in:
- Environmental sensor nodes.
- Agricultural monitors.
- Remote meters.
- Battery-powered alarms.
- Asset-tracking devices.
Common Beginner Mistakes and How to Avoid Them
Most ESP32 beginners encounter the same avoidable problems. Setup errors, incorrect board selection, unstable power, and wiring mistakes account for much of the early frustration.
Setup and Upload Errors
Common causes of upload failure include:
- Incorrect board-manager URL.
- ESP32 package not installed.
- Wrong board selected.
- Incorrect COM port.
- Missing CP2102 or CH340 driver.
- Faulty or charge-only USB cable.
- Another program holding the serial port open.
Some ESP32 boards require you to hold the BOOT button while the upload begins.
A common process is:
- Click Upload.
- Wait for the IDE to begin connecting.
- Press and hold the BOOT button.
- Release it when the upload starts.
Not every ESP32 board requires this procedure, but it is useful when automatic bootloader entry fails.
Power and Wiring Problems
ESP32 boards can draw considerably more current during Wi-Fi transmission than simple Arduino boards. A weak USB port, poor cable, or unstable supply may cause:
- Unexpected resets.
- Brownout warnings.
- Wi-Fi disconnections.
- Failed sensor readings.
- Intermittent boot problems.
Use a stable power source and a reliable data cable.
The ESP32 uses 3.3 V logic. Connecting 5 V signals directly to non-tolerant ESP32 pins can damage the microcontroller. Check every sensor and module before wiring and use a logic-level converter or voltage divider where required.
Careful power and wiring habits transfer directly into professional hardware design and are reinforced through our PCB Designing Programme.
Using Input-Only and Boot-Strapping Pins Incorrectly
Not every ESP32 pin behaves the same way. Depending on the module:
- Some GPIO pins are input-only.
- Some pins affect the boot process.
- Some pins are connected internally to flash memory.
- Some ADC pins behave differently while Wi-Fi is active.
Always check the pinout for your exact ESP32 development board before connecting sensors or outputs.
How to Choose the Right ESP32 Training in Bangalore
Choosing the right training programme affects how quickly you become confident with ESP32 and IoT development. Strong programmes combine electronics fundamentals, real hardware, wireless communication, cloud integration, and guided projects rather than passive lectures alone.
What a Strong Curriculum Includes
- Arduino IDE setup and board-package installation.
- ESP32 architecture and pin configuration.
- C and C++ programming fundamentals.
- Digital and analog sensor interfacing.
- Wi-Fi client and access-point modes.
- Bluetooth Classic and BLE.
- MQTT communication.
- Cloud dashboards.
- Web-server development.
- Power management and deep sleep.
- Debugging and Serial Monitor skills.
- A complete IoT capstone project.
Hands-on laboratory time is essential because IoT skills are demonstrated by building working systems, not by watching videos.
Learning Formats and Support
Students and working professionals across Karnataka, Kerala, and Tamil Nadu may benefit from flexible formats such as:
- Classroom training in Bangalore.
- Weekend batches.
- Weekday evening batches.
- Blended online and practical lab sessions.
- Project mentoring.
- Post-course doubt-clearing support.
To discuss the most suitable learning path, reach our team through the Contact Us page.
Structured Training vs Self-Study for ESP32
| Factor | Self-Study | Structured Training at Microskill Lab |
|---|---|---|
| Setup Guidance | Trial and error | Guided live setup support |
| Project Feedback | Limited | Direct trainer mentoring |
| Portfolio Outcome | Varies widely | Structured capstone projects |
| Debugging Skills | Slow to build | Taught systematically |
| Hardware Access | Self-arranged | Practical lab access |
| Job Readiness | Uncertain | Focused and practical |
Tools and Technologies You Will Use
- Arduino IDE.
- ESP32 board package.
- Arduino C++ programming.
- Wi-Fi libraries.
- Bluetooth and BLE libraries.
- MQTT libraries.
- Cloud platforms and dashboards.
- Common sensors and actuators.
- Serial Monitor and Serial Plotter.
- Git or another version-control system for project code.
Recommended Learning Path
- Electronics Fundamentals
- Arduino Programming and Projects
- Internet of Things
- PIC Microcontroller Programming
- PCB Designing
- Embedded Linux Development
- Embedded Systems Pro Programme
Frequently Asked Questions
Is the ESP32 harder to program than the Arduino Uno?
Not significantly, because both can use the same Arduino IDE and the same Arduino C++ programming structure. ESP32 adds extra concepts such as Wi-Fi, Bluetooth, networking, and power management, but learners familiar with Arduino Uno usually become comfortable within a few sessions.
Do I need prior coding experience to learn ESP32 programming?
Basic familiarity with C or C++ helps, but complete beginners can start with fundamentals. Consistent practice matters more than prior experience.
Can I build real IoT projects using only the Arduino IDE?
Yes. Arduino IDE fully supports substantial ESP32 IoT projects, including sensor dashboards, web servers, wireless controls, MQTT systems, and cloud-connected devices.
Why is my ESP32 not appearing in the Port menu?
The most likely causes are a missing USB driver, a charge-only USB cable, a faulty USB port, or another program already using the serial connection. Identify the board’s USB-to-serial chip and install the correct CP2102 or CH340 driver.
Why does my ESP32 show a brownout error?
A brownout error indicates that the board’s supply voltage dropped below a safe level. Use a better USB cable, a stable power supply, and avoid powering high-current loads directly from the ESP32 board.
Which ESP32 board should a beginner buy?
A common ESP32 DevKit or ESP32-WROOM-based development board is a practical starting point because it is widely supported by tutorials, libraries, and Arduino IDE board definitions.
What projects can I build with ESP32?
Beginner and intermediate ESP32 projects include Wi-Fi weather stations, smart-home controllers, Bluetooth-controlled devices, energy monitors, plant-monitoring systems, cloud-connected alarms, web-server controls, and wireless environmental sensors.