
Embedded System Architecture Explained: Layers & Working
Embedded system architecture is the structured arrangement of hardware and software layers that work together inside a dedicated computing device. For students and beginners in Bangalore and across India, understanding this architecture is the first real step toward building microcontroller projects, IoT devices, and automotive control units. This guide breaks down the embedded system block diagram, the components of embedded system hardware, and the software layers that make devices work in real time.
⚡ Key Takeaways
- You will learn the exact layers that make up embedded system architecture, from sensors to application code.
- You will understand a typical embedded system block diagram and how signals move through it.
- You will see the difference between embedded system hardware and embedded system software responsibilities.
- You will get a clear view of how RTOS and firmware fit into the software stack.
- You will know which foundational skills to build before joining a hands-on embedded systems course in Bangalore.
What Is Embedded System Architecture?
Embedded system architecture describes how a dedicated device is organised internally to sense, process, and act on real-world data. Unlike a general-purpose computer, an embedded system is built for one job, and its architecture reflects that focus. Students in Karnataka and across South India encounter this concept early because almost every automotive, medical, or consumer electronics product runs on one.
Definition and Core Idea
At its core, embedded system architecture is a layered model. Hardware sits at the bottom, firmware and drivers sit above it, and application logic sits at the top. Each layer talks only to the layer next to it, which keeps the design predictable and easy to debug. Our trainers at Microskill Lab Training Institute introduce this layered view on day one of the Embedded Systems Pro programme, because it shapes every project a student builds afterward.
Why Architecture Matters Before You Start Coding
Many beginners jump straight into writing code without mapping out the architecture first. This habit often causes timing bugs and memory overflows once the project scales beyond a simple demo. Understanding the architecture first helps you choose the right microcontroller, plan memory usage, and decide which tasks need real-time response.
Engineering students placed in Electronic City and Whitefield-based product companies tell us this planning step is what separates a working prototype from a fragile one. Employers routinely ask freshers to explain their design choices before reviewing any code. A student who can justify the embedded system architecture behind a project stands out clearly in a technical interview.
Layers of Embedded System Architecture
A typical embedded system architecture has four broad layers: hardware, firmware, middleware (including the RTOS where used), and application software. Each layer has a distinct job, and together they form the complete embedded system block diagram used across Indian electronics manufacturing and IT-hardware companies.
Hardware Layer
The hardware layer includes the processor, memory, sensors, actuators, and communication interfaces. This is the physical foundation of embedded system hardware, and every decision here affects power consumption, cost, and processing speed. Students often start with an 8-bit microcontroller before moving to 32-bit ARM-based boards used in industrial and automotive projects.
Choosing hardware is rarely just about raw processing power. A student designing a battery-powered sensor node has to weigh sleep-mode current draw, while a student building an automotive control unit has to weigh temperature tolerance and vibration resistance. These trade-offs are exactly what we walk through on real development boards in our lab sessions, so students see the consequences of a hardware choice before they commit to it.
Software and Application Layer
Above the hardware sits the firmware, which directly controls registers and peripherals, followed by optional middleware, and finally the application layer where business logic lives. This is where embedded system software becomes visible to the end user, whether that’s a washing machine control panel or a car’s dashboard display. Our Embedded Linux Development course covers this layered software design in depth for students aiming at Linux-based product roles.
Each layer in this stack hides complexity from the layer above it. The application layer developer rarely needs to know how a specific sensor driver reads raw voltage, and the firmware developer rarely needs to know what the final dashboard screen displays. This separation is what lets teams in Bangalore’s product companies work on the same device without stepping on each other’s code.
Embedded System Block Diagram Explained
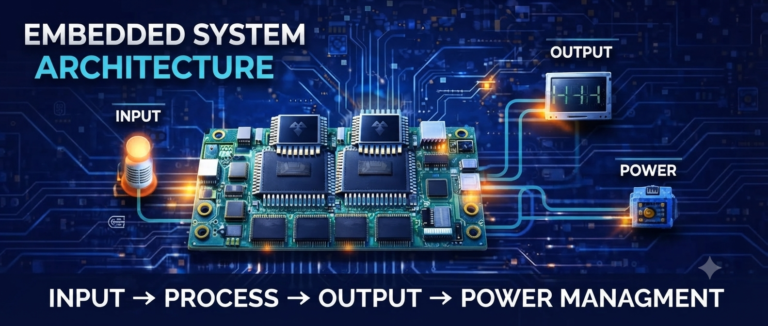
A block diagram is the simplest way to visualise embedded system architecture on paper or in an interview. It shows the flow from input to processing to output, without getting lost in circuit-level detail. Recruiters at Bangalore-based product companies frequently ask freshers to sketch this diagram during technical rounds.
Input, Processing, and Output Blocks
Every embedded system block diagram has three core sections. These are input devices such as sensors and switches, a processing unit such as a microcontroller or SoC, and output devices such as actuators, displays, or motors. Power supply and communication blocks are also drawn alongside these three sections. This simple structure applies whether you are designing a smart irrigation controller or an automotive ECU.
Reading a Block Diagram Step by Step
Start by identifying every input source, then trace the signal into the processing block where it gets converted, filtered, or interpreted. From there, follow the arrow to the output block to see what action the system performs. Reading diagrams this way, left to right, is a habit we build early in our classroom sessions so students can debug real hardware faster.
This habit also helps when a system misbehaves in the field. If an actuator does not respond correctly, tracing the block diagram backward from output to input helps narrow down the fault. It could sit in the wiring, the processing logic, or the sensor itself. We encourage students to sketch this diagram for every project before writing a single line of firmware.
Core Components of Embedded System Hardware
Hardware is where embedded system architecture becomes physical. The components of embedded system hardware fall into a few clear categories, and knowing them well is essential before you touch a breadboard. Bangalore’s electronics manufacturing and product design firms expect fresh engineers to name and justify each component during interviews.
Key hardware components include:
- Microcontroller or microprocessor as the central processing unit
- Memory blocks, including RAM for runtime data and flash or ROM for stored firmware
- Sensors such as temperature, proximity, or motion sensors for input
- Actuators such as motors, relays, and LEDs for output
- Communication interfaces such as UART, SPI, and I2C for connecting peripherals
- Power management circuitry to regulate voltage across the board
Processor, Memory, and I/O
The processor executes instructions, memory stores both code and runtime variables, and input-output pins connect the board to the outside world. Choosing between a microcontroller and a microprocessor at this stage depends on whether the application needs an onboard operating system. Our PIC Microcontroller Programming course walks students through this selection process using real project boards.
Fresh engineers who can confidently explain processor, memory, and I/O trade-offs are in steady demand across Bangalore’s electronics and product design firms. Entry-level embedded engineers in Bangalore typically start in a broad INR range depending on the company and role, and this figure should be verified against current placement data before publishing. What matters most for a beginner, though, is building the fundamentals that make that first job offer possible.
Sensors, Actuators, and Communication Interfaces
Sensors convert physical signals like heat or motion into electrical data the processor can read, while actuators do the reverse, converting processed signals into physical action. Communication interfaces then let multiple components exchange data reliably within tight timing budgets. This trio forms the backbone of most IoT and automotive embedded projects taught in our labs.
Quick comparison — Microcontroller-based vs microprocessor-based architecture:
| Feature | Microcontroller-Based Architecture | Microprocessor-Based Architecture |
|---|---|---|
| Integration | CPU, memory, and I/O on one chip | CPU only; memory and I/O are external |
| Typical Use | Dedicated, single-purpose devices | Systems needing an operating system |
| Cost | Lower for simple applications | Higher due to external components |
| Example Application | Washing machine controller | Embedded Linux gateway device |
Embedded System Software Stack
The software side of embedded system architecture is organised in layers just like the hardware, moving from low-level register access to high-level application logic. Students preparing for placement interviews in Bangalore’s IT and electronics sector are usually tested on where each software layer sits.
Firmware and Bare-Metal Programs
Firmware is the closest software layer to the hardware, and it often runs without any operating system in what is called a bare-metal setup. This layer handles interrupts, timers, and direct register access, and it demands precise, resource-aware coding. Beginners typically start writing bare-metal firmware before moving to RTOS-based projects.
RTOS and Middleware Layers
A Real-Time Operating System schedules multiple tasks and guarantees predictable response times, which general-purpose operating systems cannot promise. Middleware sits between the RTOS and the application layer, providing reusable services such as file systems or networking stacks. Our IoT certification programme introduces RTOS concepts through connected-device projects that mirror what Bangalore’s product companies build.
Not every embedded system needs an RTOS. A simple temperature-controlled fan can run happily on bare-metal firmware, while a multi-sensor industrial monitoring unit usually benefits from task scheduling and priority handling that an RTOS provides. Learning when to introduce an RTOS, rather than defaulting to one, is a judgement call we help students build through project-based practice.
Get a clear, hands-on grasp of embedded system architecture with guided lab sessions and project boards used across Bangalore’s electronics industry. Our trainers walk you through every layer, from hardware to firmware, with real debugging practice. Enrol in the Embedded Systems Pro Programme →
How Data Flows Through an Embedded System
Data flow ties the entire embedded system architecture together, connecting sensors, the processor, memory, and actuators into one working loop. Understanding this flow is what lets an engineer troubleshoot a system that behaves unpredictably.
From Sensor Input to Actuator Output
This is the part of embedded system architecture that students find easiest to visualise once the block diagram is clear.
A sensor captures a physical value, converts it to a digital signal, and passes it to the processor for interpretation against stored logic. The processor then sends a command to an actuator, completing what is often called the sense-process-act loop. This loop repeats continuously in devices such as automated irrigation systems and industrial safety controllers.
Understanding this loop matters more once a system combines multiple sensors and actuators at once. A smart building controller, for example, might read temperature, occupancy, and light-level sensors together before deciding how to adjust HVAC and lighting output. Mapping every sense-process-act loop separately, then combining them, is how our students approach multi-sensor projects without getting overwhelmed.
Real-Time Constraints and Interrupts
Timing behaviour is a core concern in embedded system architecture. Many embedded systems must react within strict time limits, which is why interrupts exist to pause normal processing for urgent events. Missing a timing deadline in a real-time system, such as an airbag controller, can have serious consequences. This is why our curriculum places heavy emphasis on interrupt handling and timing analysis, not just theory.
An interrupt lets a low-priority task step aside instantly when a higher-priority event occurs, such as a sudden sensor reading that needs an immediate safety response. Poorly managed interrupts can cause missed deadlines or unpredictable behaviour, which is a common source of bugs for beginners. We dedicate hands-on lab time specifically to interrupt service routines so students see this behaviour on real hardware, not just in a textbook diagram.
Learning Embedded System Architecture in Bangalore: Where to Start
Bangalore’s electronics and IT-hardware ecosystem, spread across Electronic City, Whitefield, and Manyata Tech Park, offers strong entry points for students who understand embedded architecture well. Building this foundation early makes every later course, from PCB design to embedded Linux, easier to follow.
Students from across Karnataka, Tamil Nadu, Kerala, Telangana, Andhra Pradesh, and Pondicherry travel to Bangalore specifically for this hands-on training. The city concentrates so much of India’s electronics and product-engineering hiring. A strong grip on architecture fundamentals is what recruiters expect before they even discuss project experience.
Skills You Need Before Enrolling
A working knowledge of embedded system architecture is easier to build once a few basics are in place. Before your first embedded systems class, it helps to be comfortable with:
- Basic C programming syntax and logic
- Number systems, especially binary and hexadecimal
- Fundamental electronics concepts like voltage, current, and resistance
- Reading simple circuit diagrams
How Our Embedded Systems Pro Programme Builds This Foundation
Our classroom and lab sessions in Bangalore teach embedded system architecture from these fundamentals and move step by step into microcontroller programming, RTOS concepts, and live project builds. Learners get hands-on time with development boards rather than simulation-only exercises. If you are ready to move from theory to a structured, mentor-guided path, our Electronics Fundamentals course is a strong starting point before the Pro programme.
Frequently Asked Questions
What is embedded system architecture in simple terms?
It is the organised structure of hardware and software layers that lets a dedicated device sense, process, and respond to real-world inputs.
What are the main components of embedded system hardware?
The main components are the processor, memory, sensors, actuators, communication interfaces, and power management circuitry.
What is the difference between firmware and an RTOS?
Firmware is low-level code that runs directly on hardware, often without an operating system, while an RTOS schedules multiple tasks with guaranteed timing.
Do I need to know C programming before learning embedded architecture?
Basic C programming knowledge helps, since most firmware and application-layer embedded code is written in C.
Where can I learn embedded system architecture with hands-on practice in Bangalore?
Microskill Lab Training Institute offers classroom and lab-based training in Bangalore covering hardware, firmware, and RTOS concepts with live project boards. You can reach out through our contact page to discuss batch options.